
Travel and Storage
- What is the best way to travel with a hair and beard set. Of course I am planning on carry-on as I don’t trust checked luggage with valuables.
The most important thing when traveling with a wig or beard is to make sure the pieces are secure and can’t move around or be crushed, whether they are on a head or not.
If you have the option to block your pieces onto a foam or canvas head, that’s usually ideal but you’ll still want to secure the head in a sturdy cardboard box or even a wig carrier (check ebay!). You can do this by attaching a dowel rod to the interior of the box or case, or by stuffing newspaper around the base of the head. I suggest covering the top of the wig with a sheet of tissue paper to lessen potential flyaways or frizz.
If you don’t travel with it on a head, lay it down on a piece of tissue paper. Wad another piece of tissue paper up and lay it in the wig, then wrap the whole thing gently in the tissue paper it is laying on. Tape the paper closed but don’t compress the wig. If need be, add another piece of tissue paper to make sure the whole wig is covered. The best way to carry your tissue wrapped wig is in a wide paper bag with handles. If you need to put it in a suitcase, put it near the top of the case, and try to section off the part of the suitcase with pieces of cardboard. Alternatively, if your suitcase is large enough, pack the tissue wrapped wig in a cardboard box.
When travelling or shipping, your wig might be slightly “smushed” but this is easily remedied upon arrival by a quick shake out or fluffing. As long as the piece isn’t loose and in contact with other items in your luggage, it will be fine. Avoid plastic bags or wrapping as this can cause static and flyaways.
- How should one store their piece(s) if on a Styrofoam head on a bureau is not an option.
If you can’t store the wig on a foam or canvas block, then lying flat in a box is the next best way. Place the wig on it’s back and stuff gently with a piece of wadded up tissue. Line the box with another piece of tissue, then lay the wig on it. Make sure the lace front is not folded or in any other way wrinkled or stretched, and then cover with another piece of tissue. Close box up (make sure the box is large enough that you can close it or put a lid on it without smashing your wig) and store in a place where it won’t be crushed or get damp.
If you store multiple wigs, it’s especially important that they each be wrapped in tissue separately and laid side by side or in separate boxes.
However you store your wig, be sure never to put it away damp, with glue still on it, or still dirty and styled. At the minimum, try to remove any adhesive and comb through the wig prior to storage. As long as it isn’t crushed or exposed to extreme temperatures, the wig will be fine.
- I have about 20 wigs that I use at various times throughout the year. what is the best way to store them? and how far in advance should you take them out of storage before you wear them for a performance?
As noted above, be sure they are each stored separately. Wigs left in a box or drawer together without any sort of buffer or barrier between them are more prone to getting tangled, frizzy and just generally damaged. This is especially true with long wigs and with lace front wigs. Vintage hat boxes or wig carriers can be a great resource for storing and organizing a large stock of wigs. For long term storage, it’s nice if the box or crate has some small holes or openings to allow air to circulate. If your wigs tend to smell musty or stale when you take them out of storage, be sure they are completely dry before they are put away and make sure the storage area is free from moisture. You might also put a dryer sheet into the box (though make sure it’s not touching the wig)
When you take them from storage really depends on the type of wig and how much work you need to do to it. If it’s a synthetic wig that you wear “as-is”, then you can take it out, run a comb through it if need be and be ready to go (assuming you washed it prior to putting it into storage). If it’s a human hair wig, or a wig that needs styling or washing, then allow at least a few days time, especially if you need to wash and set the wig.
When washing a human hair wig, I prefer to wash it and let it dry before beginning the rolling and styling process. Why? Because I find that spraying a wig lightly with setting spray (30% gel, 30% water, 30% rubbing alcohol) and then putting it onto rollers allows the hair to dry faster, which nearly always results in a better set and it saves time. Also, when hair is soaking wet, it stretches, which can make the rollers loosen up as the hair dries. Since most roller sets rely on tension at the root, stretchy hair can undermine the style.
If at all possible when working with human hair wigs, try to add some heat to the rolling process. The heat evaporates the water and makes the roller set much more effective. If you don’t have a full cabinet wig dryer, try using a bonnet dryer (again, check ebay!). Even spending a few minutes blow drying the set wig can help the wig set more effectively.
Wigs in History
- Did women in the 18th century American colonies wear wigs or not? I am seeing both arguments about equally often, and it is driving me wiggy!
This is a great question and it’s one I doubt we’ll ever have a definitive answer to. In any era, trying to make absolute declarations about dress, ornament or behavior is nearly impossible.This topic could be an entire book, and is worth much more substantial research that I’m able to provide in this blog post, but here is my two cents.
I think it is unlikely that none of the ladies living in the American colonies never wore a wig – many of the ladies considered themselves European and attempting to follow modes from “home” would have been important to them. Based on paintings from the period, it doesn’t seem as though even fashionable Colonial ladies wore the more extreme, frankly false wigs so popular in Europe, but I think it’s safe to assume that at least some women would have opted for wigs, at least some of the time. I’ve included a painting of Abigail Adams Smith (1785), daughter of John and Abigail Adams – if she’s not wearing a wig, then the painter has either taken liberties or she has the most perfect and obliging hairline ever grown in the 18th century. The giveaway, to me at least, is how low her hairline goes, well below the ears, and there is a certain sharpness and fullness to the bottom edge of the hairline that is not often seen in nature. Even creative combing and hairdressing would have been unlikely to achieve that level of shape and density.
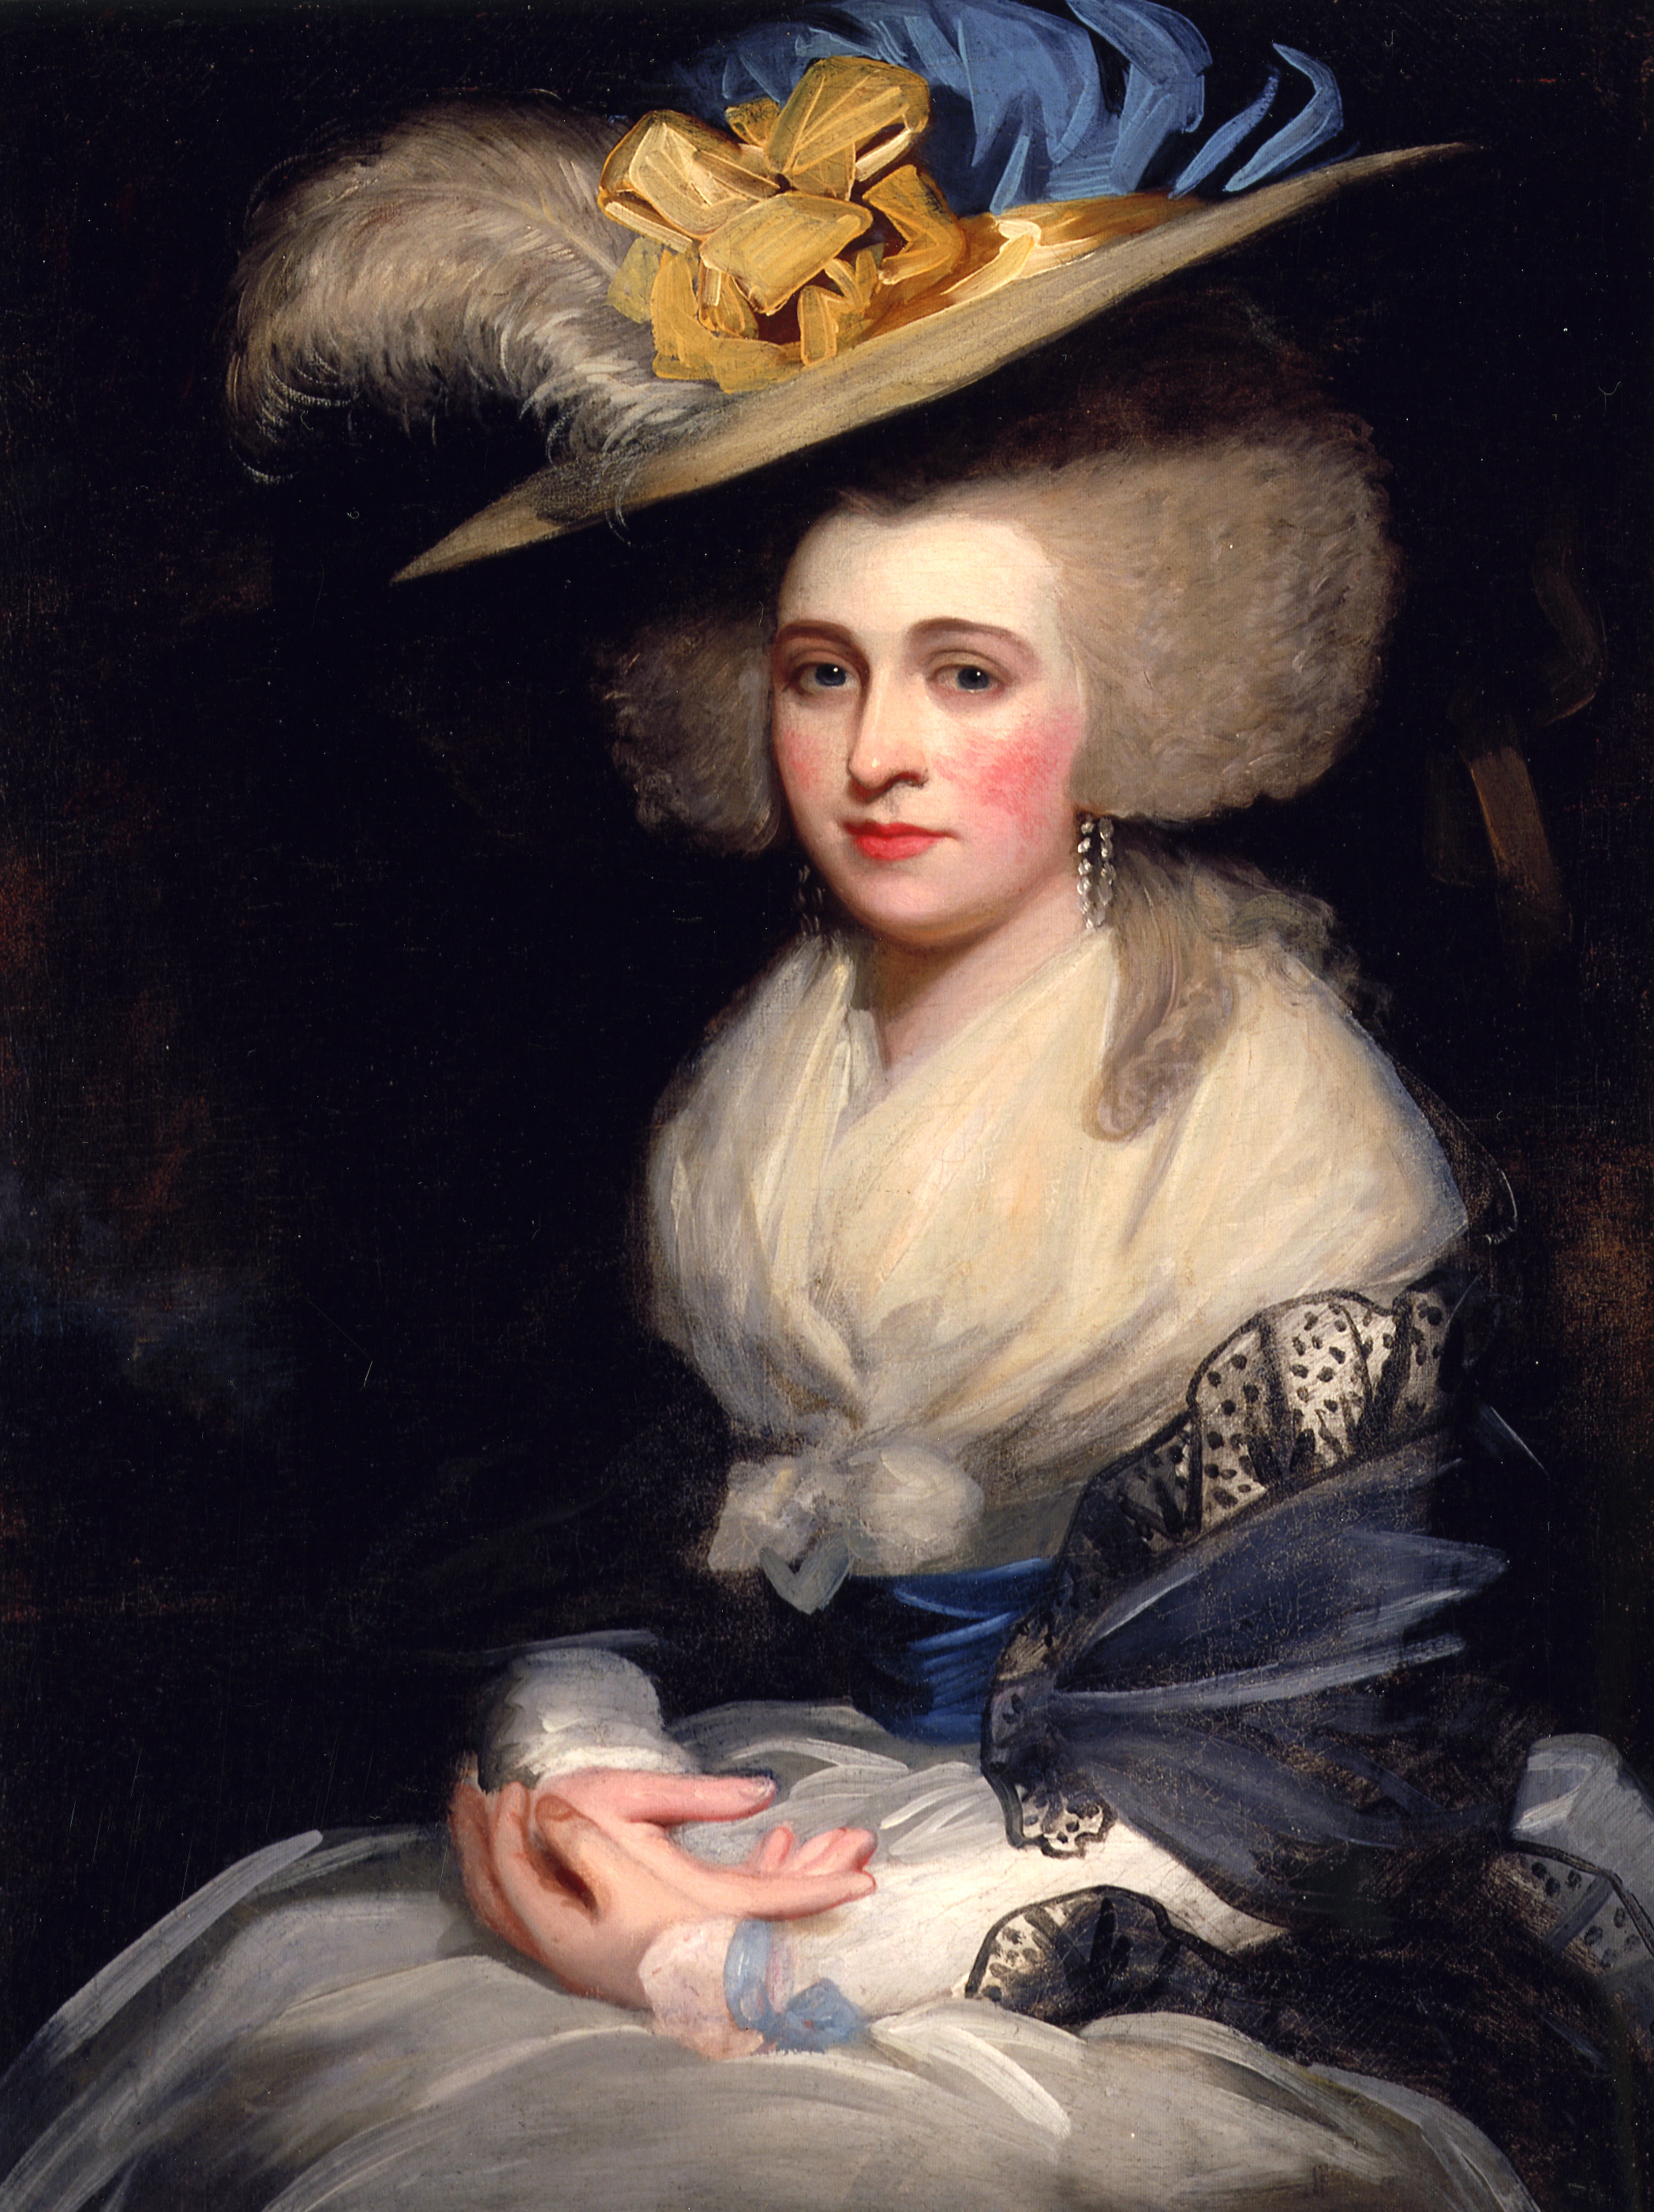
Abigail Adams Smith painted in 1785 by Mather Brown.
A general characteristic of 18th century art is that painters tended to render their subject very naturally, even when their hair or dress was extremely heightened. This means that in many cases, even a towering white coiffure that certainly never grew out of someone’s head is painted as though it were their very own.
While this made for lovely paintings, it can make it difficult for a modern viewer to know exactly how and when wigs were worn. A good indicator is the shape of the hairline – a crisp, symmetrical hairline or a hairline with a very stylized shape or unnatural fullness usually indicate a wig. Likewise, a hairstyle so large that it can’t possible exist without at least some assistance is probably a wig.
Many of the traditional masculine wig styles are easier to recognize in portraits, as their shape and placement on the head often indicate a wig is worn. In general, men’s 18th century wigs tended to be more stylized and had types and styles – the bag wig, the bob wig, etc that are more easily recognized.
- How would one choose wig or hairpiece color for mousy brown hair turning grey in streaks? And what would a lady have done in 1810 or 1860 in that situation?
In modern times, machine-made, commercially available hairpieces are sold in standardized colors, which includes a standard set of “Grays” (categorized by what percent of the hair is brown/black and what percent is white). So you would be limited to the mass-produced colors available, which may or may not accurately reflect your own color or the percentage of brown to white hairs. It can be especially difficult if your hair is a lighter brown color, as there are generally not as many gray blends available that include lighter tones.
Matching hairpieces if you are partially gray can also be difficult if your white hairs tend to be in streaks or concentrated at your nape or temples. Most commercially available pieces are an even distribution of white and brown hairs, designed to produce a salt-and-pepper gray. Your best option is probably going to be having a human hair piece made for you that is matched to both your brown color and your white color – it’s going to give you the most natural color match and it can be changed as your hair color continues to change. Wig makers are able to match all of the colors in your hair and create wigs and pieces that more closely match your own hair – we make these sorts of pieces often for clients and are able to use a standard hair color chart to ensure a correct color match, even if we’re working with a client who is far away.
A lady in the past would have had a few options for adding some false hair to her style. Using hairpieces to achieve a fashionable coiffure has been quite common throughout history, right up through the 1960’s (and it seems to be attempting a comeback in modern times).

Examples of hairpieces available in the 1880’s.
One of the easiest options for any lady would be to save all of the hairs that she combed out of her hair each day. They went into a decorative jar and when you had enough hair, you could form it into a rat or pad to use as a support or ballast for your hair. The size of your rat depended on the styles of the time. In certain eras, you might have also used netting or other fibers (like wool) to make these pads. A few eras where large rats/pads and hairpieces were a requirement for achieving the styles include 1770s, 1880’s and many Edwardian pompadours.
Other options for ladies would have included purchasing hair from another woman who was willing to sell and having it made into a hairpiece, or going to a barber or wig maker and having a piece made for you from hair they had purchased. Selling hair was a common way for poorer women to earn extra money (as told in Little Women, for example) and barbers, hairdressers and wig makers would purchase the hair to make wigs and hairpieces for ladies with enough money to buy a little help for their hairdo. While I have no source to substantiate this, it doesn’t seem entirely out of the realm of possibility that some Dickens-esque villain would have been above stealing or grave-barbering to sell hair for a tidy sum.
Specifically in 1810, an older woman probably would have chosen to wear a cap or turban rather than an elaborate hairpiece. The hairstyles for the era were relatively simple and could generally be achieved without substantial aid from fake hair. In 1860, there were many options for purchasing pieces, and just like today, it would have been a matter of finding a barber or wig maker who could create a piece that matched.
Wearing and Cleaning Your Wig
- I have a lot of hair. How do I fit it under a wig?
The key to fitting your hair under a wig is a tight, secure wig prep.
Short or thin hair (chin length or so) – use a series of flat, tight pin curls to secure hair. The pin curls don’t need to be twisted tightly, just wind the hair flat, and pin. The goal is to minimize the bulk.
Medium length hair, or hair that is very fine or layered – use pin curls for the front and top section of the hair, and tight, flat braids for the rest of your hair.
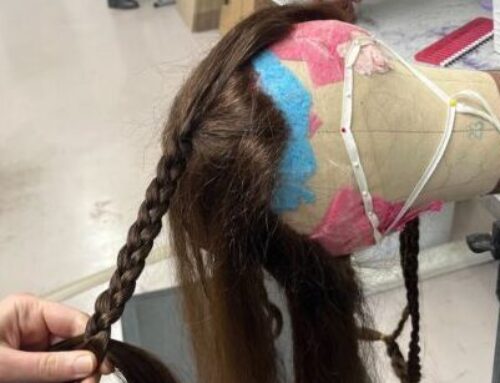
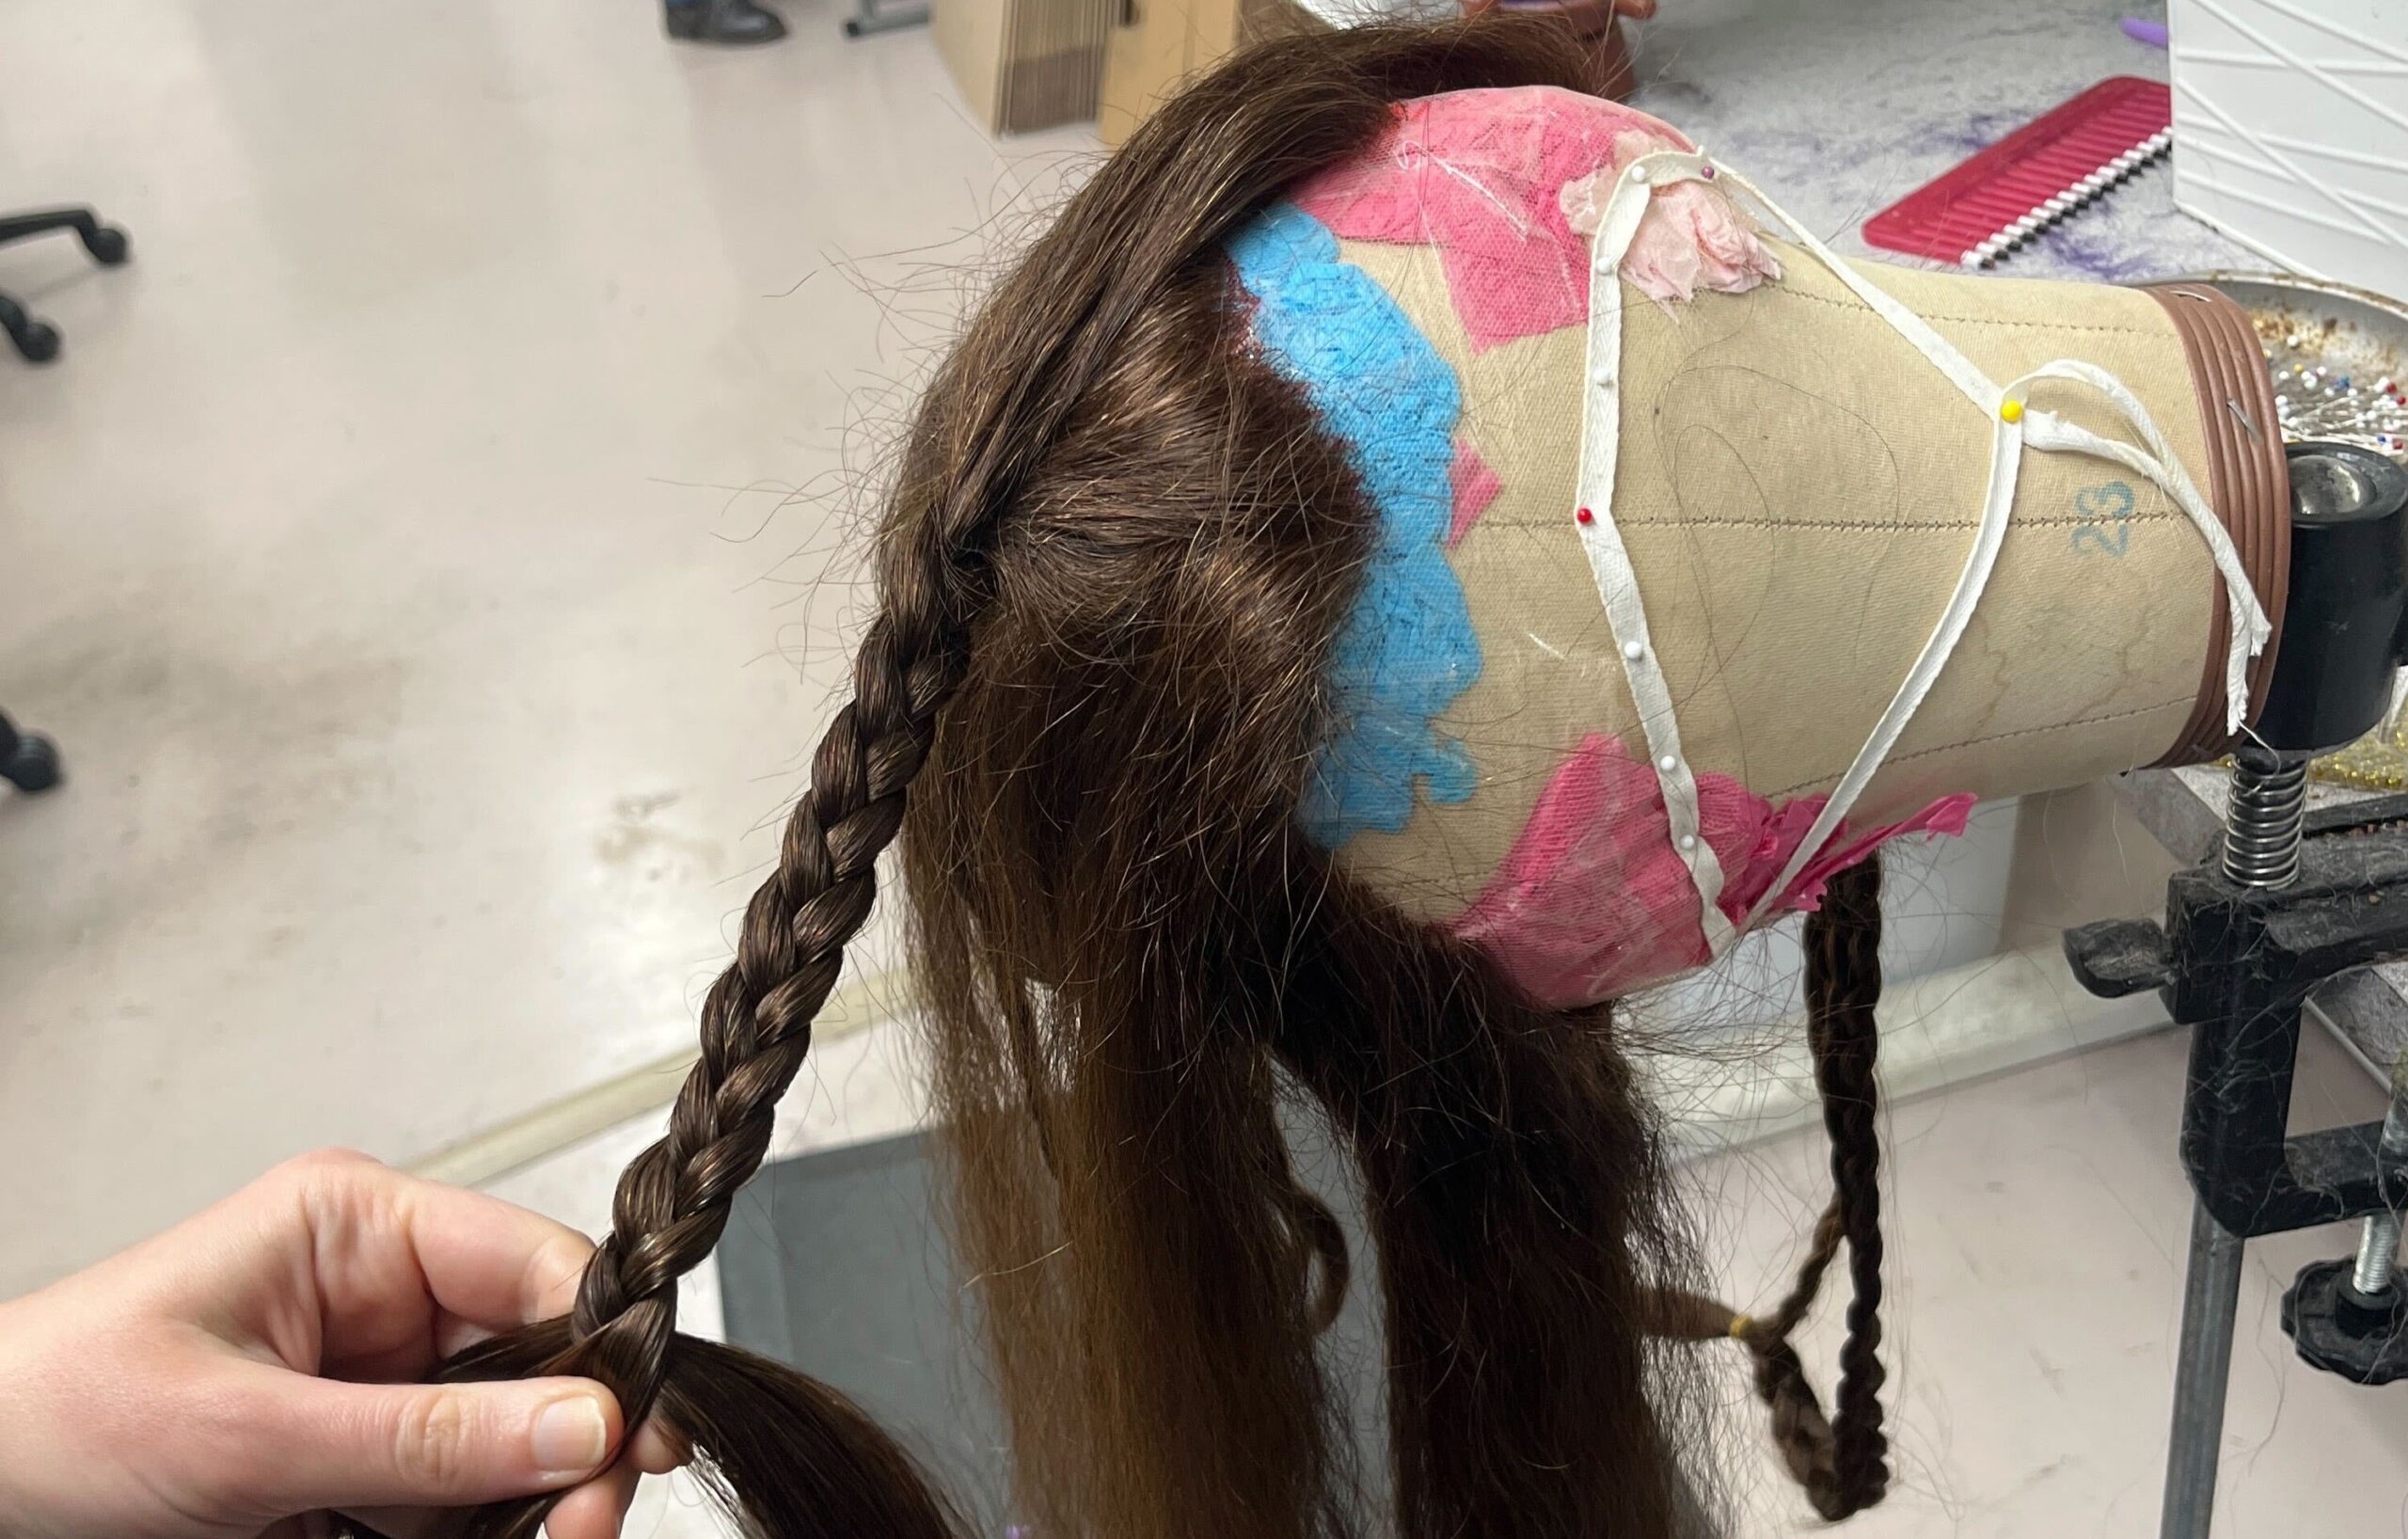
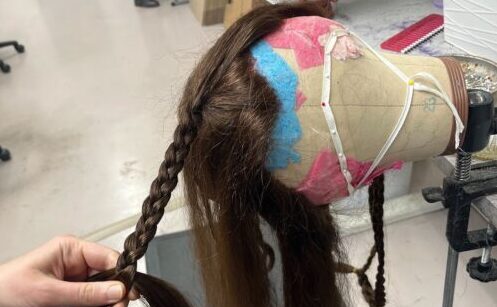
Long and/or very thick hair – put two small, flat pin curls on the top of your head for anchoring (see below for more), and then braid the rest of your hair. Distribute your hair evenly with the goal of minimizing bulk. Depending on how much hair you have, this can mean anywhere from two to four braids. Pin the braids up on your head and secure. See photo below for a long hair wig prep.
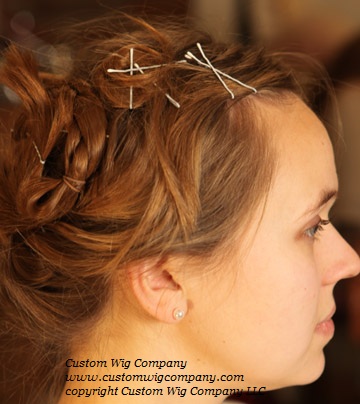
Long hair put into braids with anchoring pin curls on the top of the head.
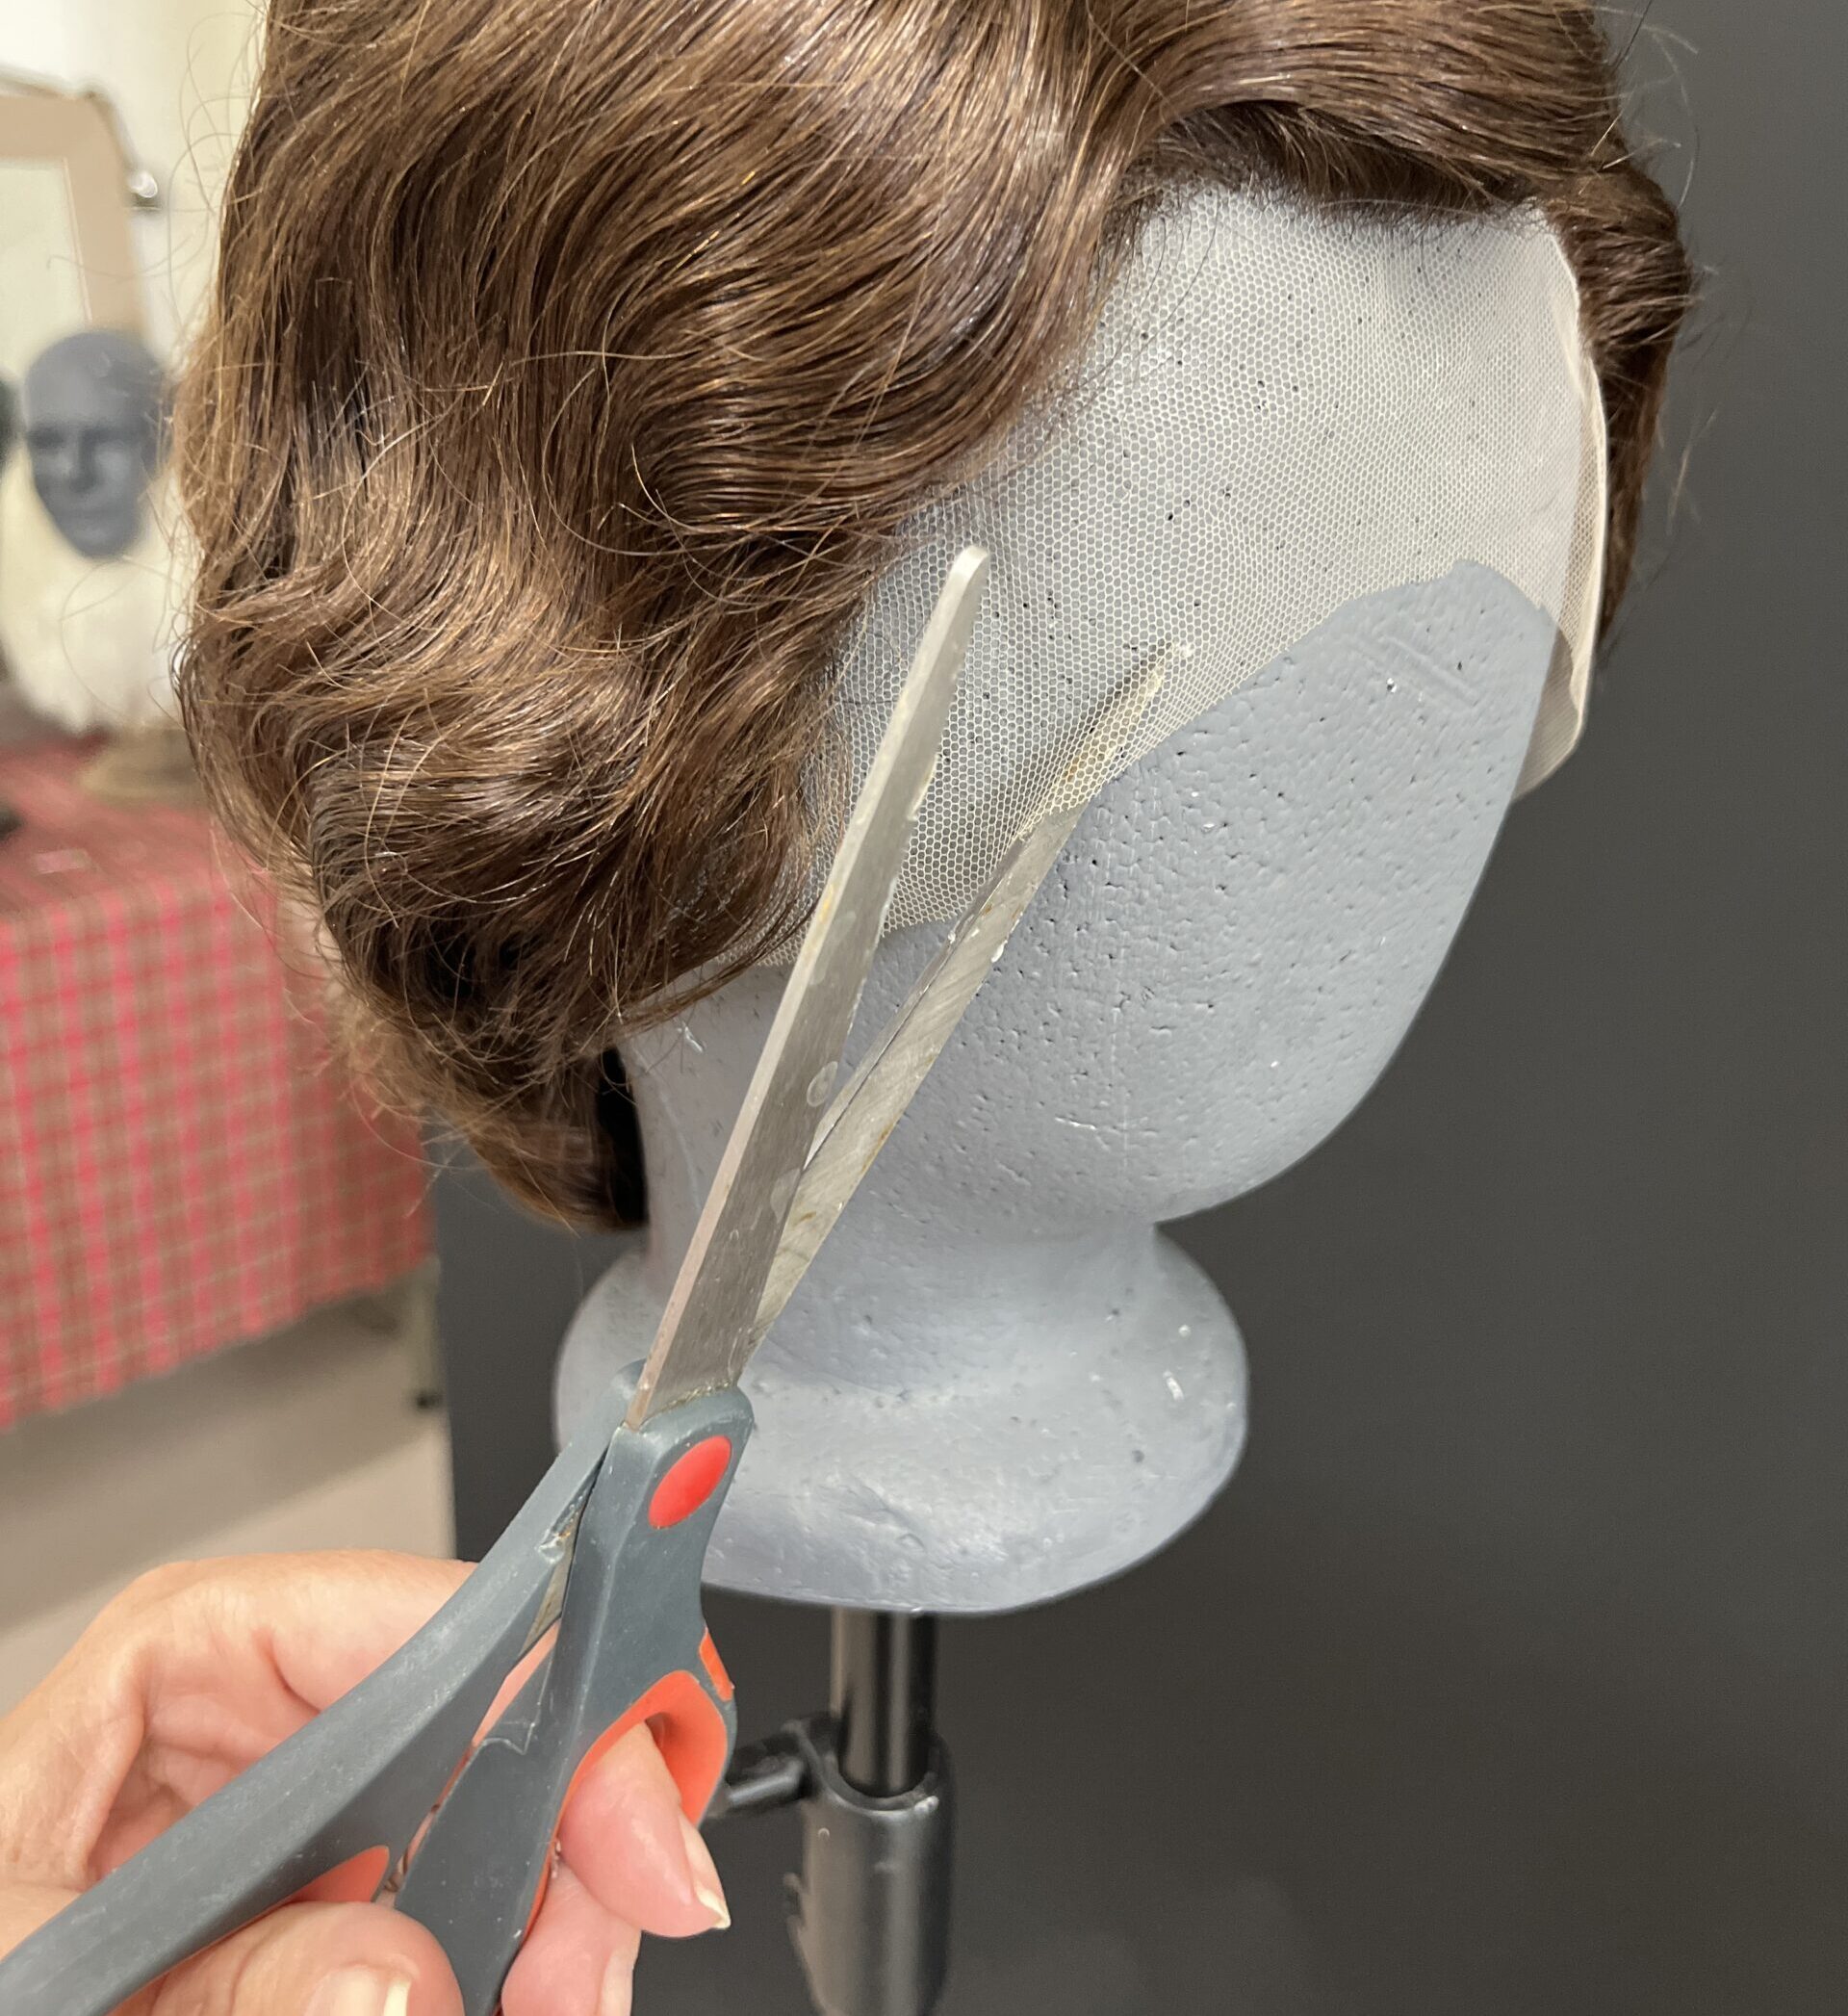
The wig cap should sit behind your hairline in the front, especially if you are wearing a lace front wig. Generally, the wig cap should be close to the color as your hair, no matter what color the wig is. This may seem counter-intuitive but if you have dark hair and a white wig, putting a white wig cap on can create a high contrast line where your dark hair meets your wig cap. This line can show through the wig. A dark wig cap over dark hair makes a more seamless canvas for your wig.
Once the cap is secure, put your wig on. After you are sure the wig is placed correctly on your head, secure the wig by using two large hairpins on the top of the wig, into pin curls on the top of your head. This is the most important pinning, as this will keep your wig on your head! After this is done, pin down the wig at the nape using a pair of crossed bobby pins at each corner. Add other pins as needed to ensure the wig is secure and that the edges are all pinned in place. If your wig has a lace front, this is the time to glue it. Don’t glue before your pin, in case you discover you need to adjust your wig placement.
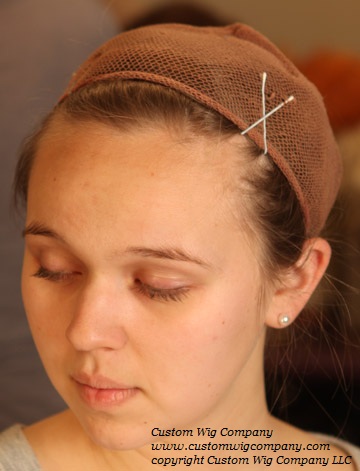
The wig cap anchored over prepped hair.
If your wig is very back-heavy, use some small hair pins to anchor the front of the wig around your hairline. Make sure they are pinned through the wig and into your wig cap.
No matter what, make sure all of your anchoring pins go through the wig, wig cap and into your pin curls or braids. This is what will keep your wig on intact.
- How do I clean makeup and adhesive off of my wig and off of my skin?
Before removing your glue-on wig or facial hair, be sure to use a cotton pad soaked in alcohol to loosen the glue. Peeling the lace off without loosening it first will damage both skin and lace. If you are a heavy sweater, you may find this step unnecessary. If the lace resists at all, use the alcohol.
To clean makeup off of wig lace, try applying a gentle detergent like Woolite and letting it sit on the soiled area. Rinse carefully. Reapply if necessary. Do not use a petroleum based make up remover.
To remove adhesive, use 90% isopropyl rubbing alcohol – it will be most effective if you clean the lace as soon as possible after wearing. For small spots, a quick dab or spritz of alcohol will probably do the job. For larger or more stubborn areas, lay the lace edge in a shallow dish of the alcohol and let it soak (a jar lid is great for this). For stubborn glue that won’t come out even after soaking, a very soft toothbrush or dauber can be used to carefully loosen the glue.
Its best to clean the glue off first, using alcohol, before trying to remove stubborn makeup. Water tends to make adhesive residue harder to clean. The added bonus is that the alcohol may take care of your makeup stains.
To remove glue from your skin, use a cotton ball moistened with a combo of witch hazel (astringent) and mineral oil (emollient). You can also buy pre-packaged spirit gum remover and other adhesive removers. Do not use these on your wig lace, as the oils can damage the lace.
If you have sensitive skin, and find that spirit gums irritate, try using Pros-Aide 2 or Prosthetic Adhesive, two stronger, gentler glues. If those aren’t available, you can also apply a thin layer of zinc oxide cream (ie diaper rash cream) to your skin prior to gluing – it makes a barrier that protects your skin from glue.
If your adhesive just won’t stick when you put your wig on, make sure the skin is free from oils and moisture. Avoid putting makeup,lotions or creams (except zinc oxide!) in the area you plan to glue. In a pinch, swab the area with a cotton ball soaked in rubbing alcohol.
Still have questions? Want to know more? Let us know here or post a question on our Facebook page!
Also, be sure to check out our FAQ and also our Pinterest boards: How-To’s and Pictorial Glossary to see more examples of some of the items and topics discussed.

Leave A Comment