Styling Wigs with Rollers
Using rollers to style wigs is one of the most versatile styling techniques you can learn. Roller (or curlers) are an amazing tool for styling wigs but getting started with them can be a little overwhelming. There are so many sizes and styles, how do you know which ones to use and how to use them? Our three part series will explain the physics of rollers so you can use them to style wigs.
Please note that this series primarily focuses on styling human hair wigs with rollers. Many of these techniques are also true for synthetic fiber wigs, but not all.
Part one covers choosing the right size and number of rollers. Part 2 discusses good (and bad) roller techniques to help you get the results you’re looking for. Part 3 puts it all together and details how to use rollers to achieve a specific wig style.
Why you should use rollers for wig styling
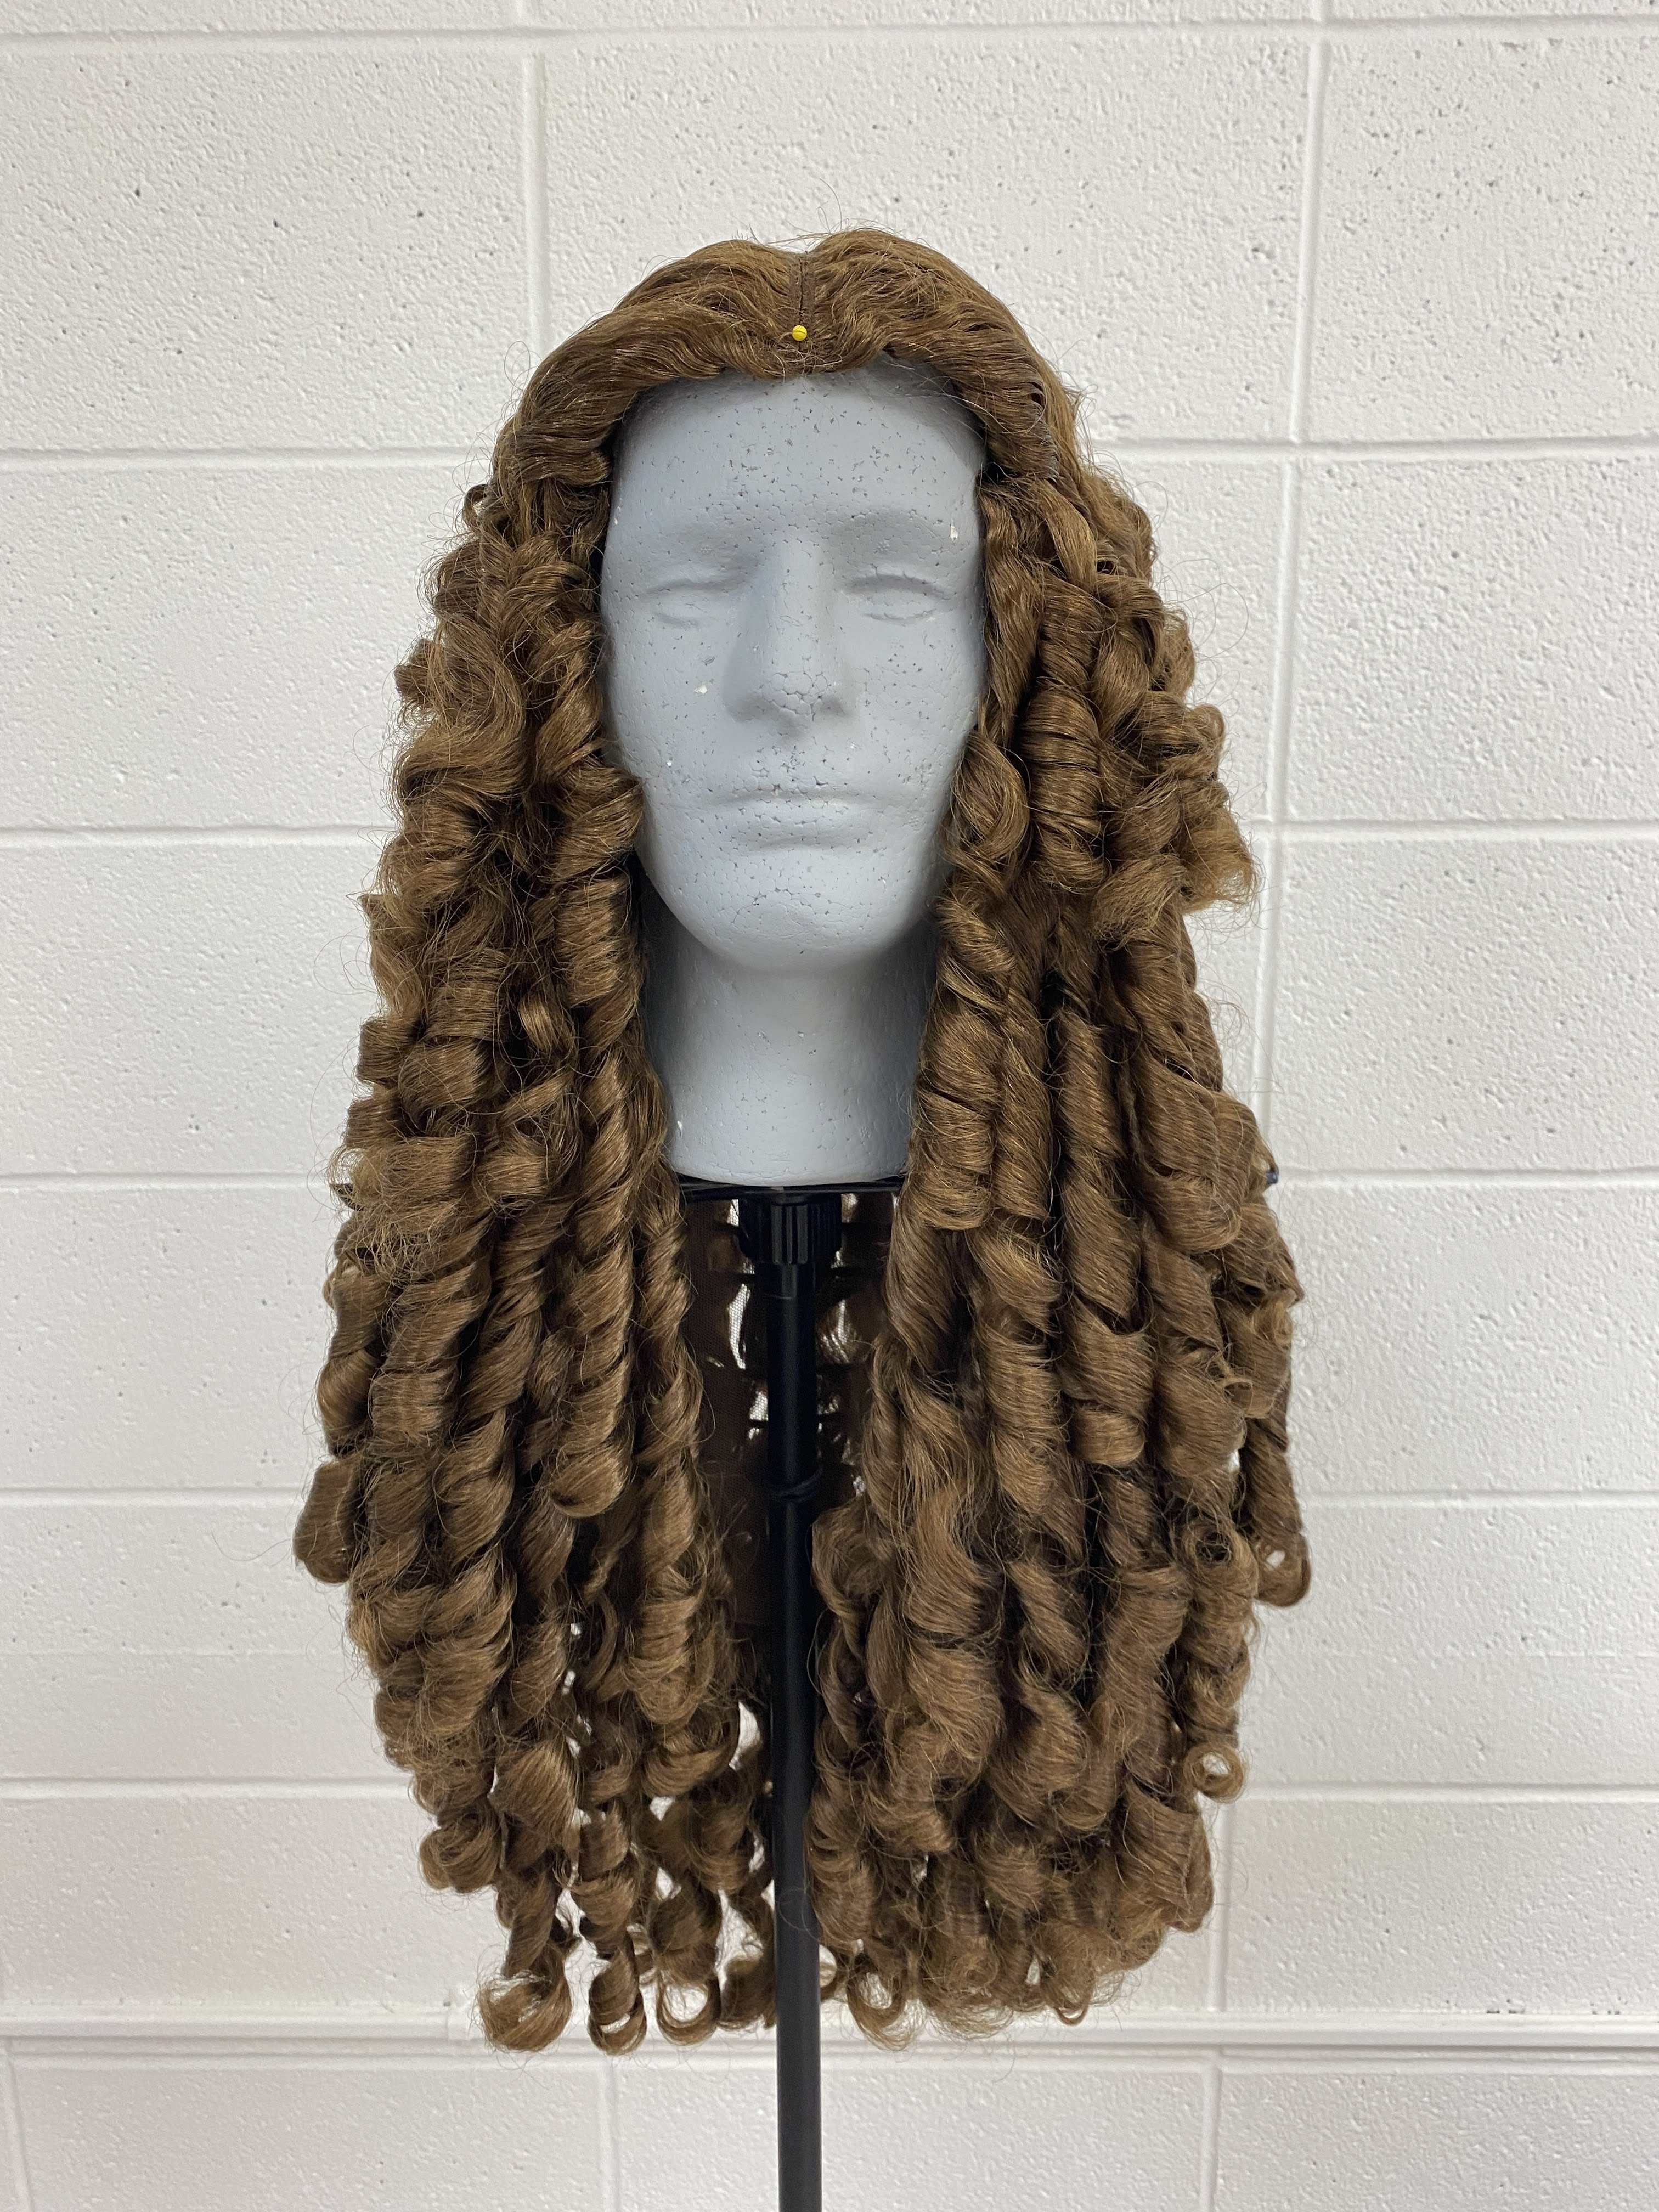
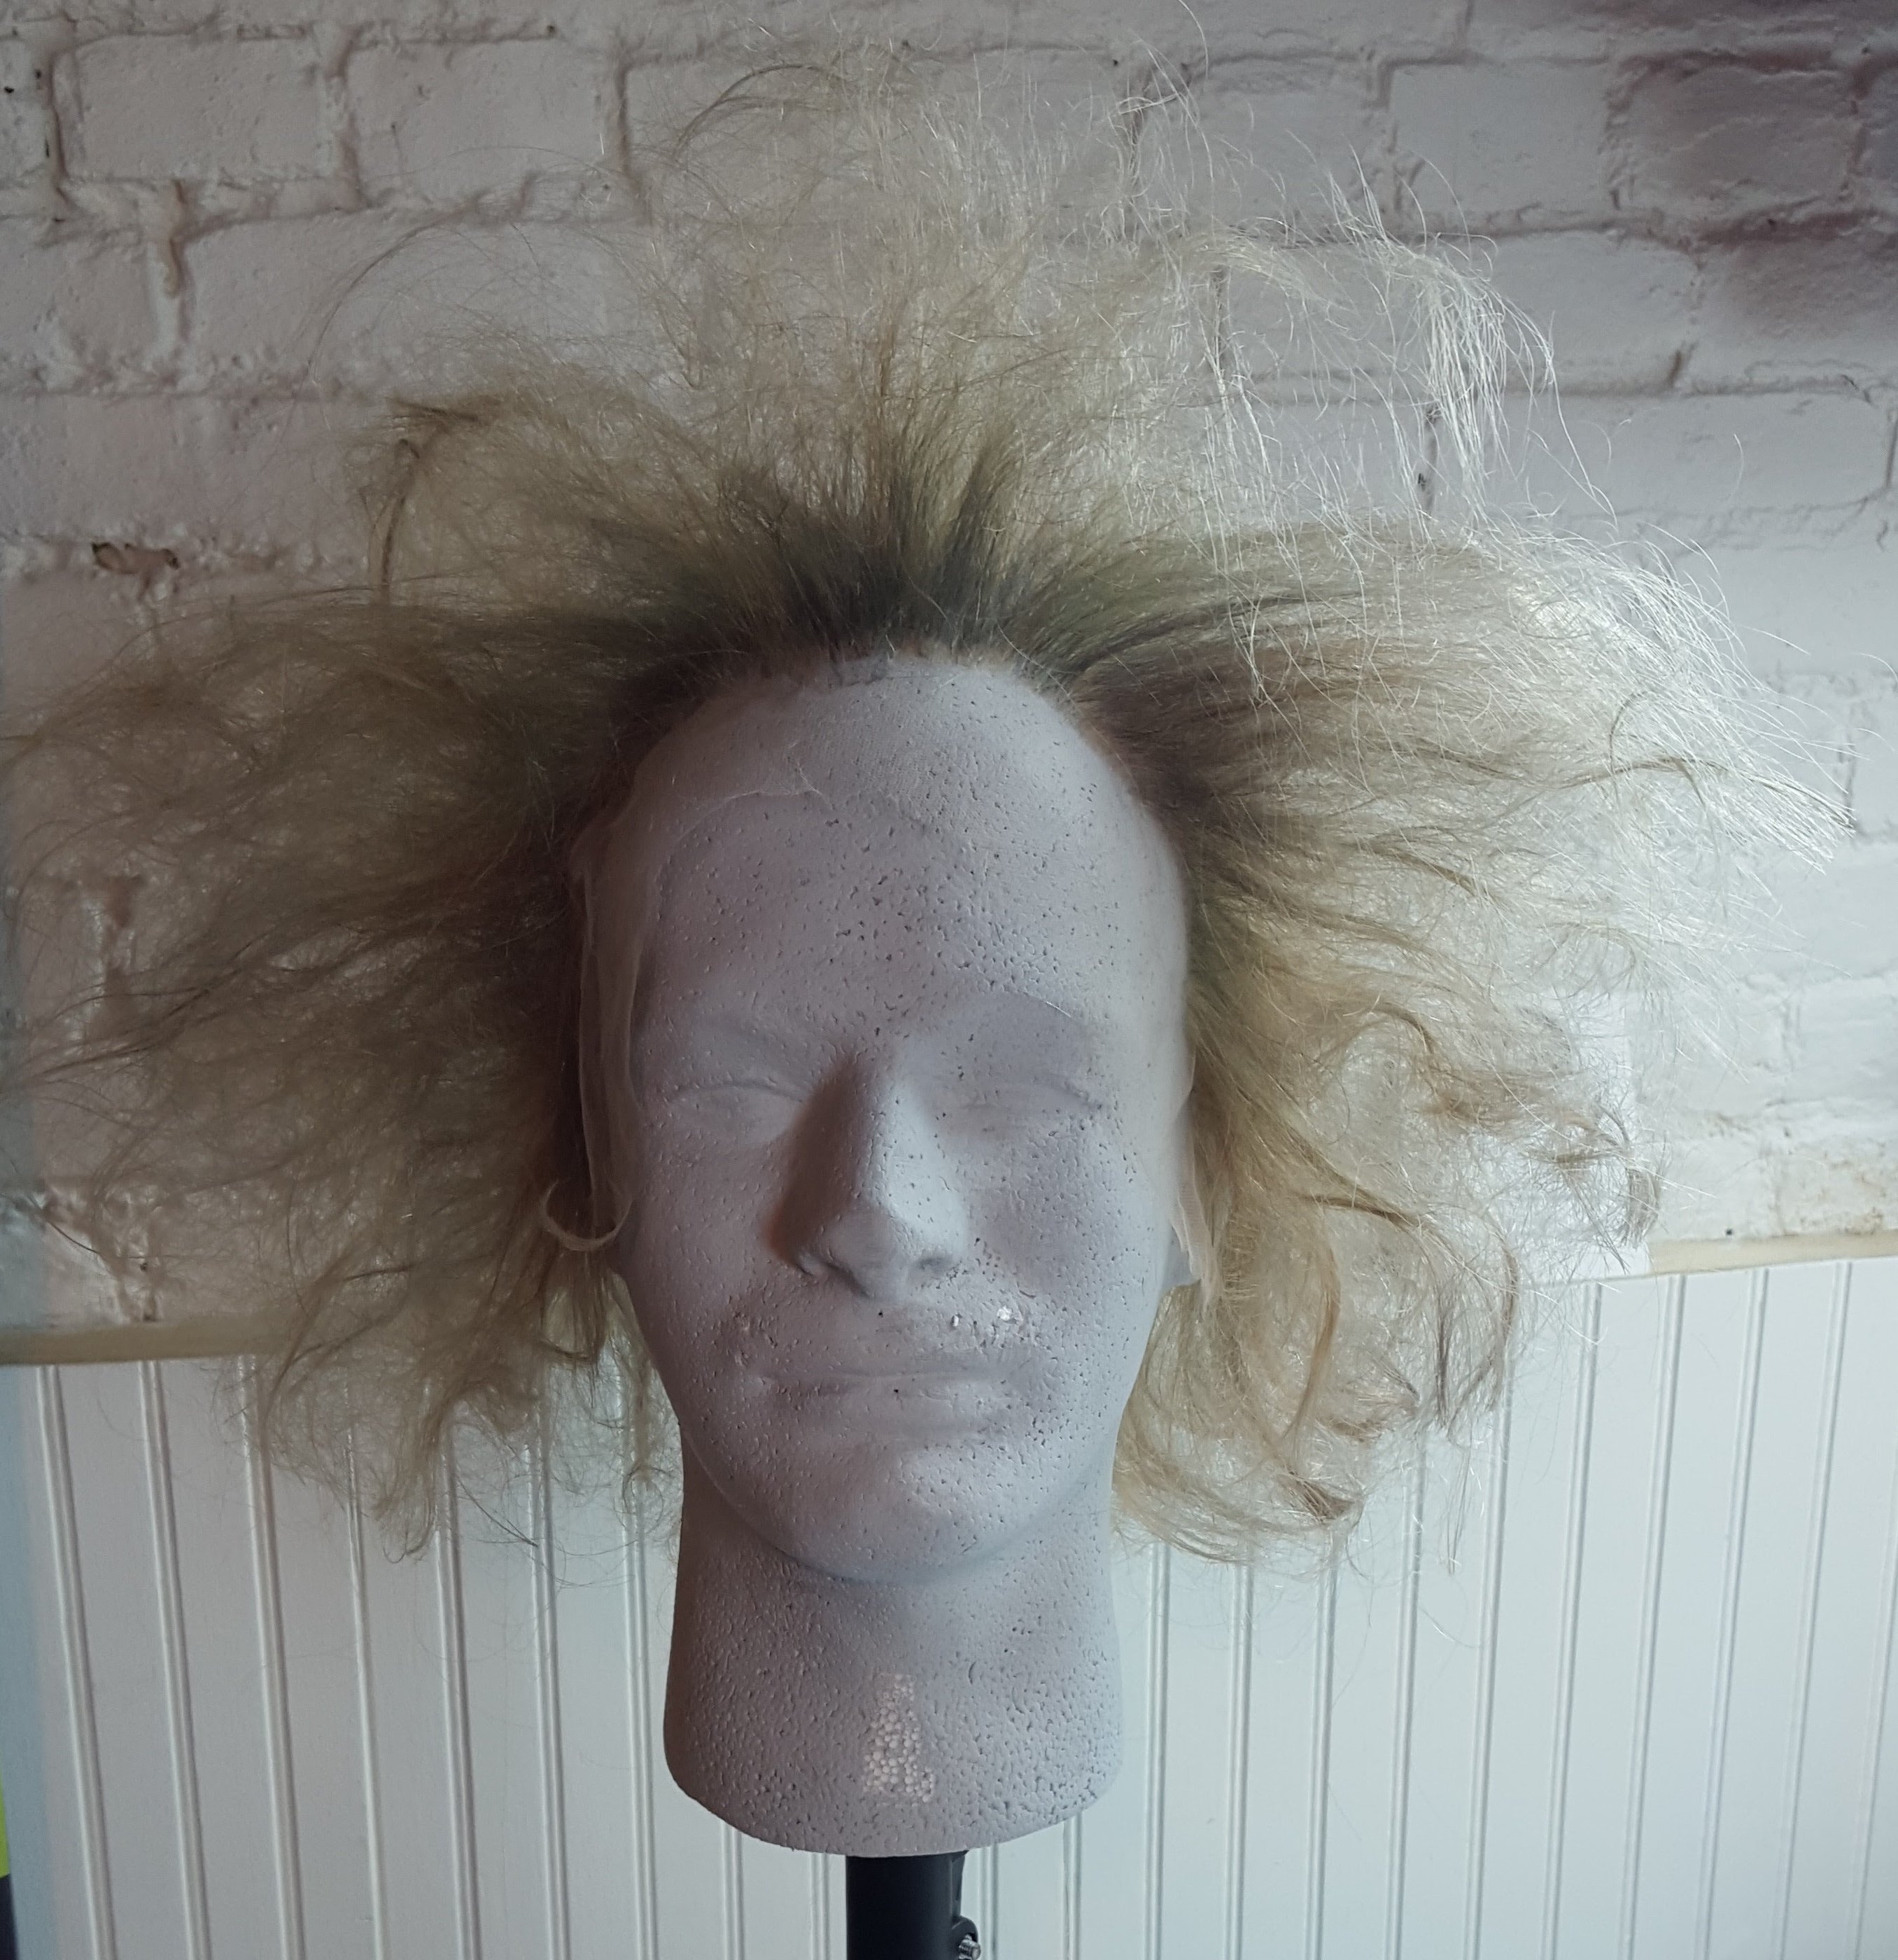
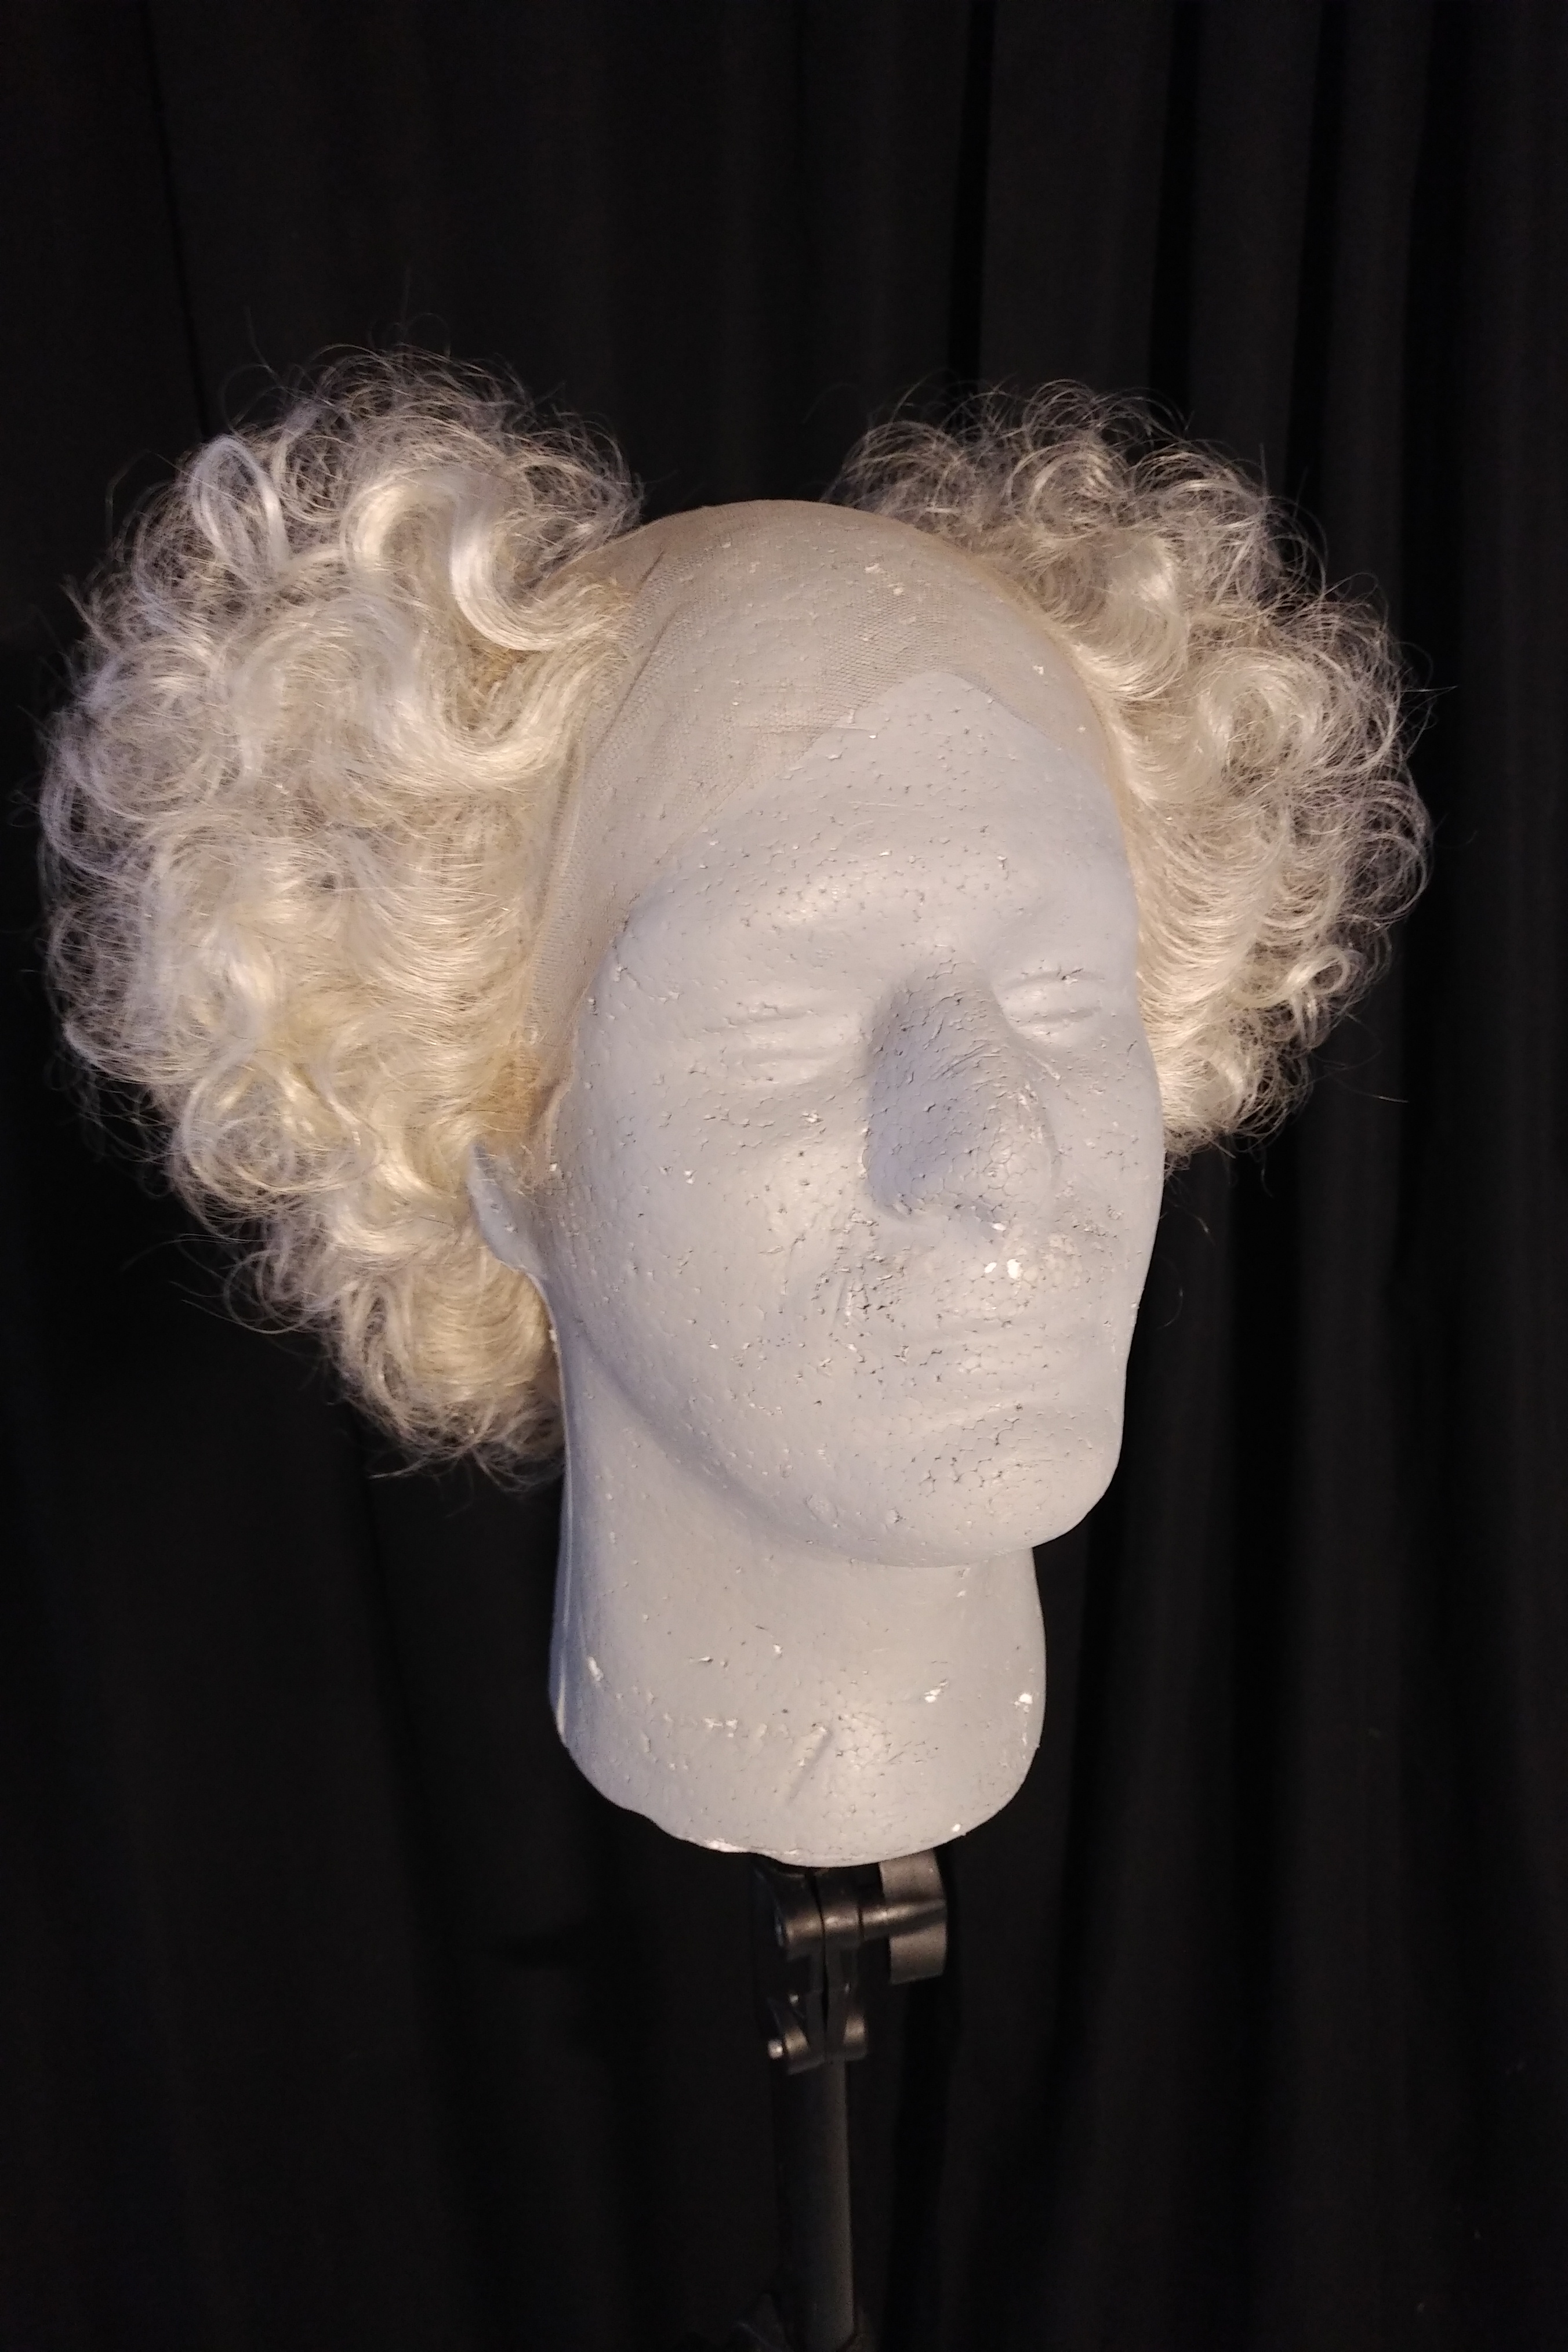
Styling wigs with rollers is useful for more than just recreating classic ‘roller set’ hairstyles (common early 20th century styles) or curls. When you use rollers, you tell the hair which direction you want it to go. You also shape the length of the hair and the way the hair will behave at the root. Rollers are a valuable styling tool for a huge range of wig styles, even those that don’t appear to be ‘curly’. Every wig in the gallery below was styled using rollers – even though that’s definitely not how a lot of these hairstyles occurred originally!
Styling wigs with rollers – where to start
What Size Roller Should I Use?
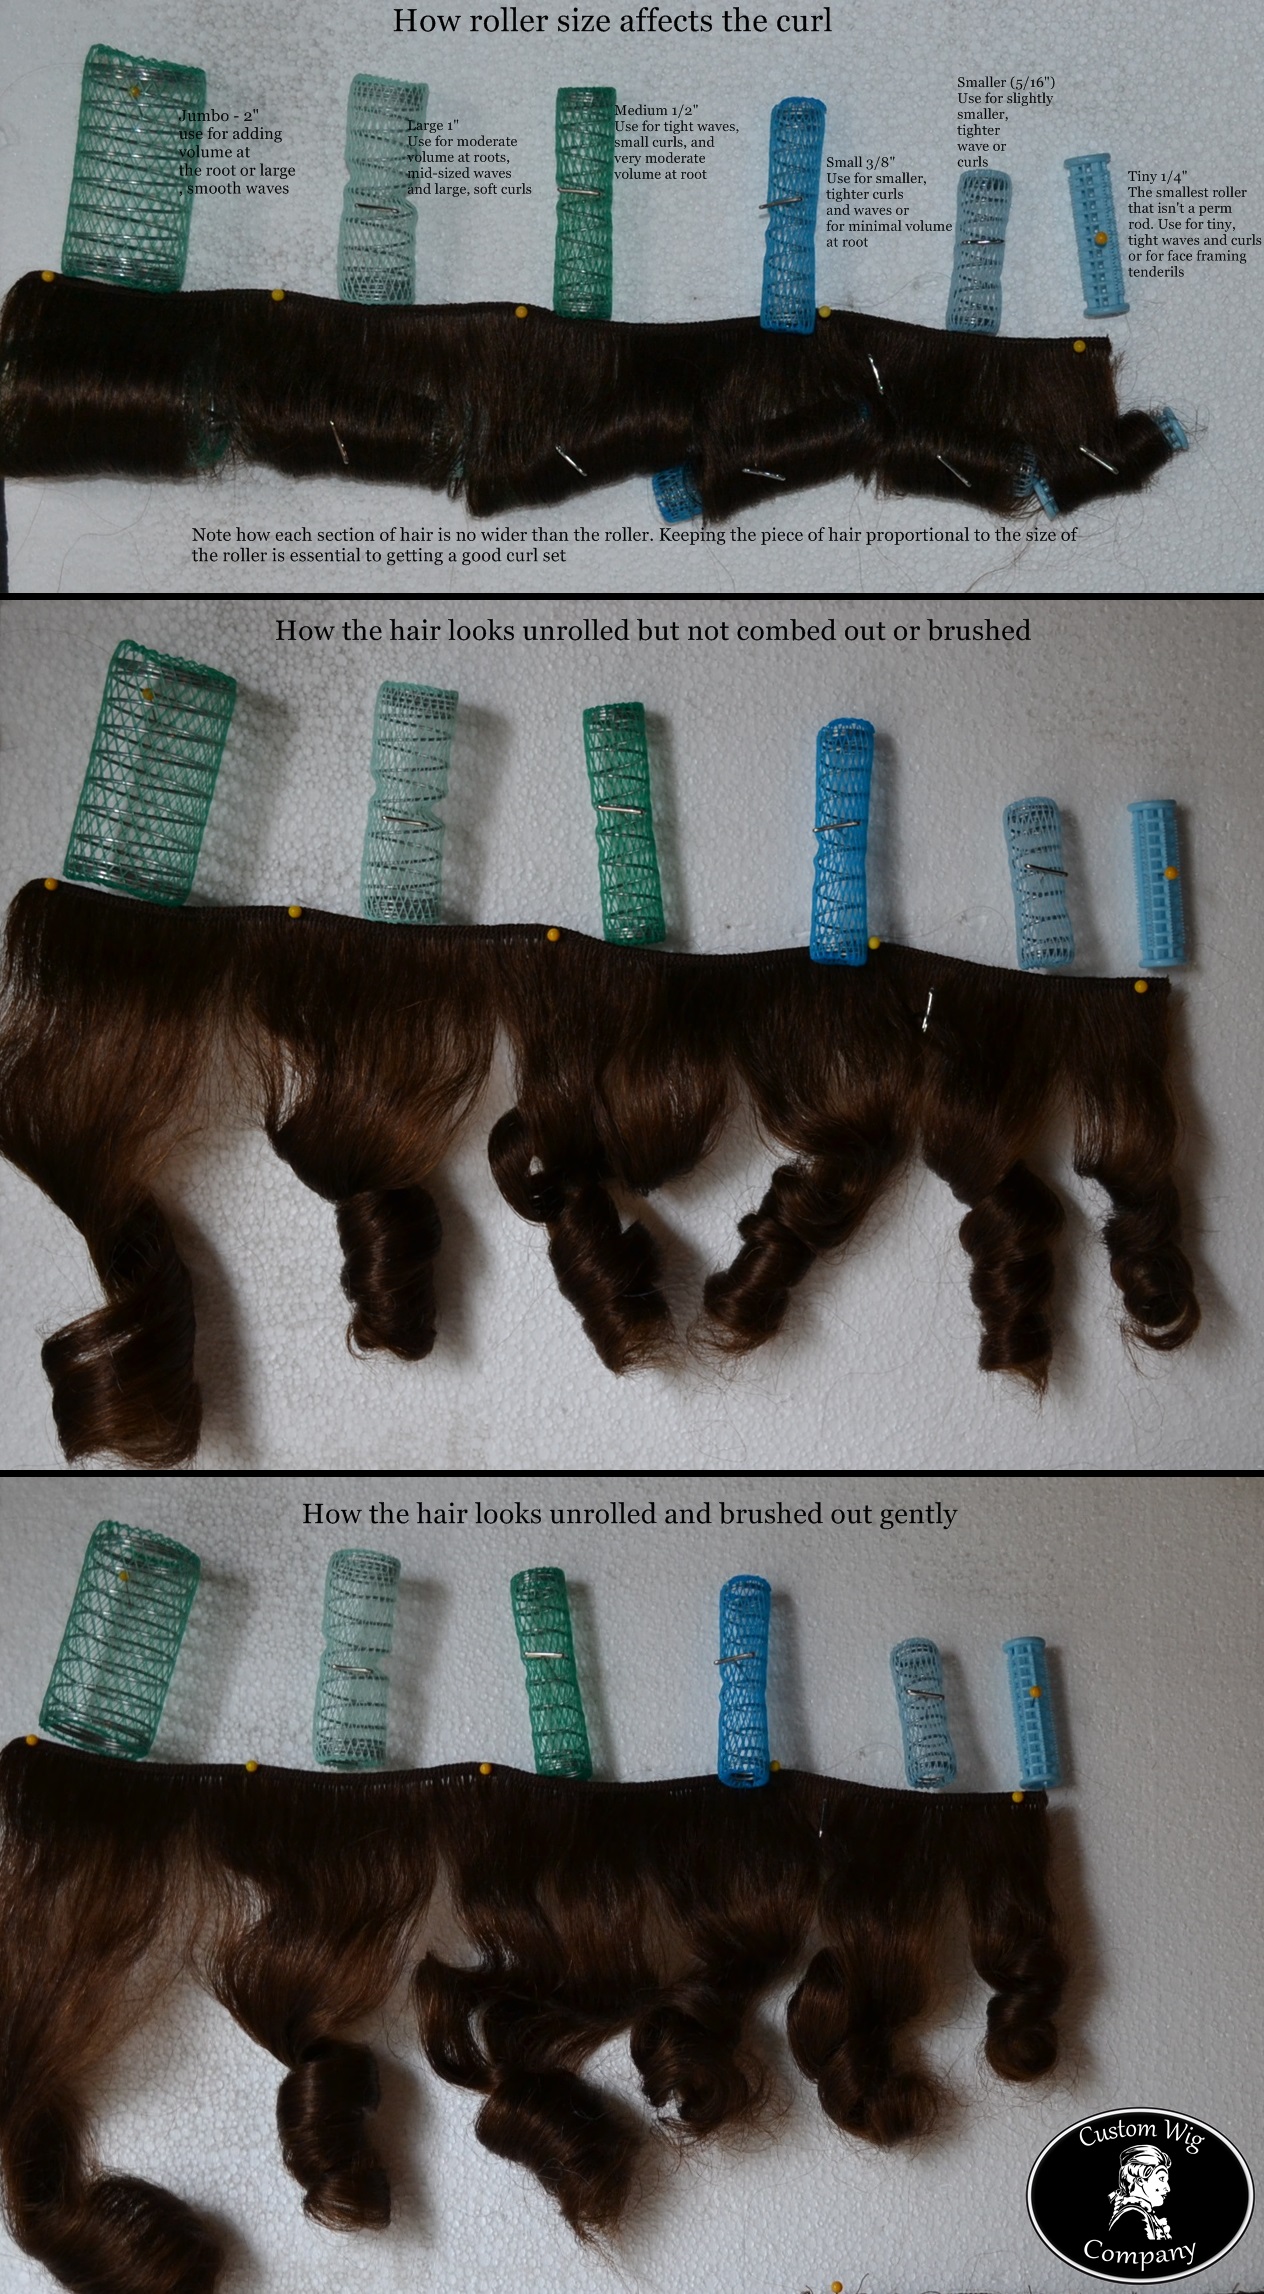
Picking the correct size of roller for the style is essential. If the rollers are too big or too small, the shape of the curls and waves will be wrong and the style won’t turn out well.
- Large rollers (1″ and up): make smooth waves or big, soft curls. They add more height/volume at the root. Use larger rollers for styles that need a lot of lift at the roots or when you want to give gentle wave or curl.
- Small rollers (1/4 – 1/2″): make small tight, waves or curls. They produce less height or volume at the root. Use smaller rollers for styles that are close to the head, require more defined curls or small, tighter waves.
- Very small rollers (under 1/4″): make extremely small, tight curls. Use these when you need a lot of fine, small or tight curls.
Since smaller rollers make a tighter curl pattern in the hair, they also tend to “eat up” more of the hair length. Be aware that you might need to start with longer hair than you realize if your style requires tighter curls.
As you can see in the above comparison photo, the largest roller makes the widest, softest pattern. It’s more of a wave than a curl. The smallest roller makes a shorter, tighter curl. Although you’ll be combing and manipulating the hair once it comes out of the roller, it’s important to put the right size “bend” or shape into the hair. Many common hair styles will actually require a combination of sizes -perhaps the style needs a lot of volume at the roots but tighter curls towards the bottom.
So the size is pretty important, what else do I need to know about styling wigs with rollers?
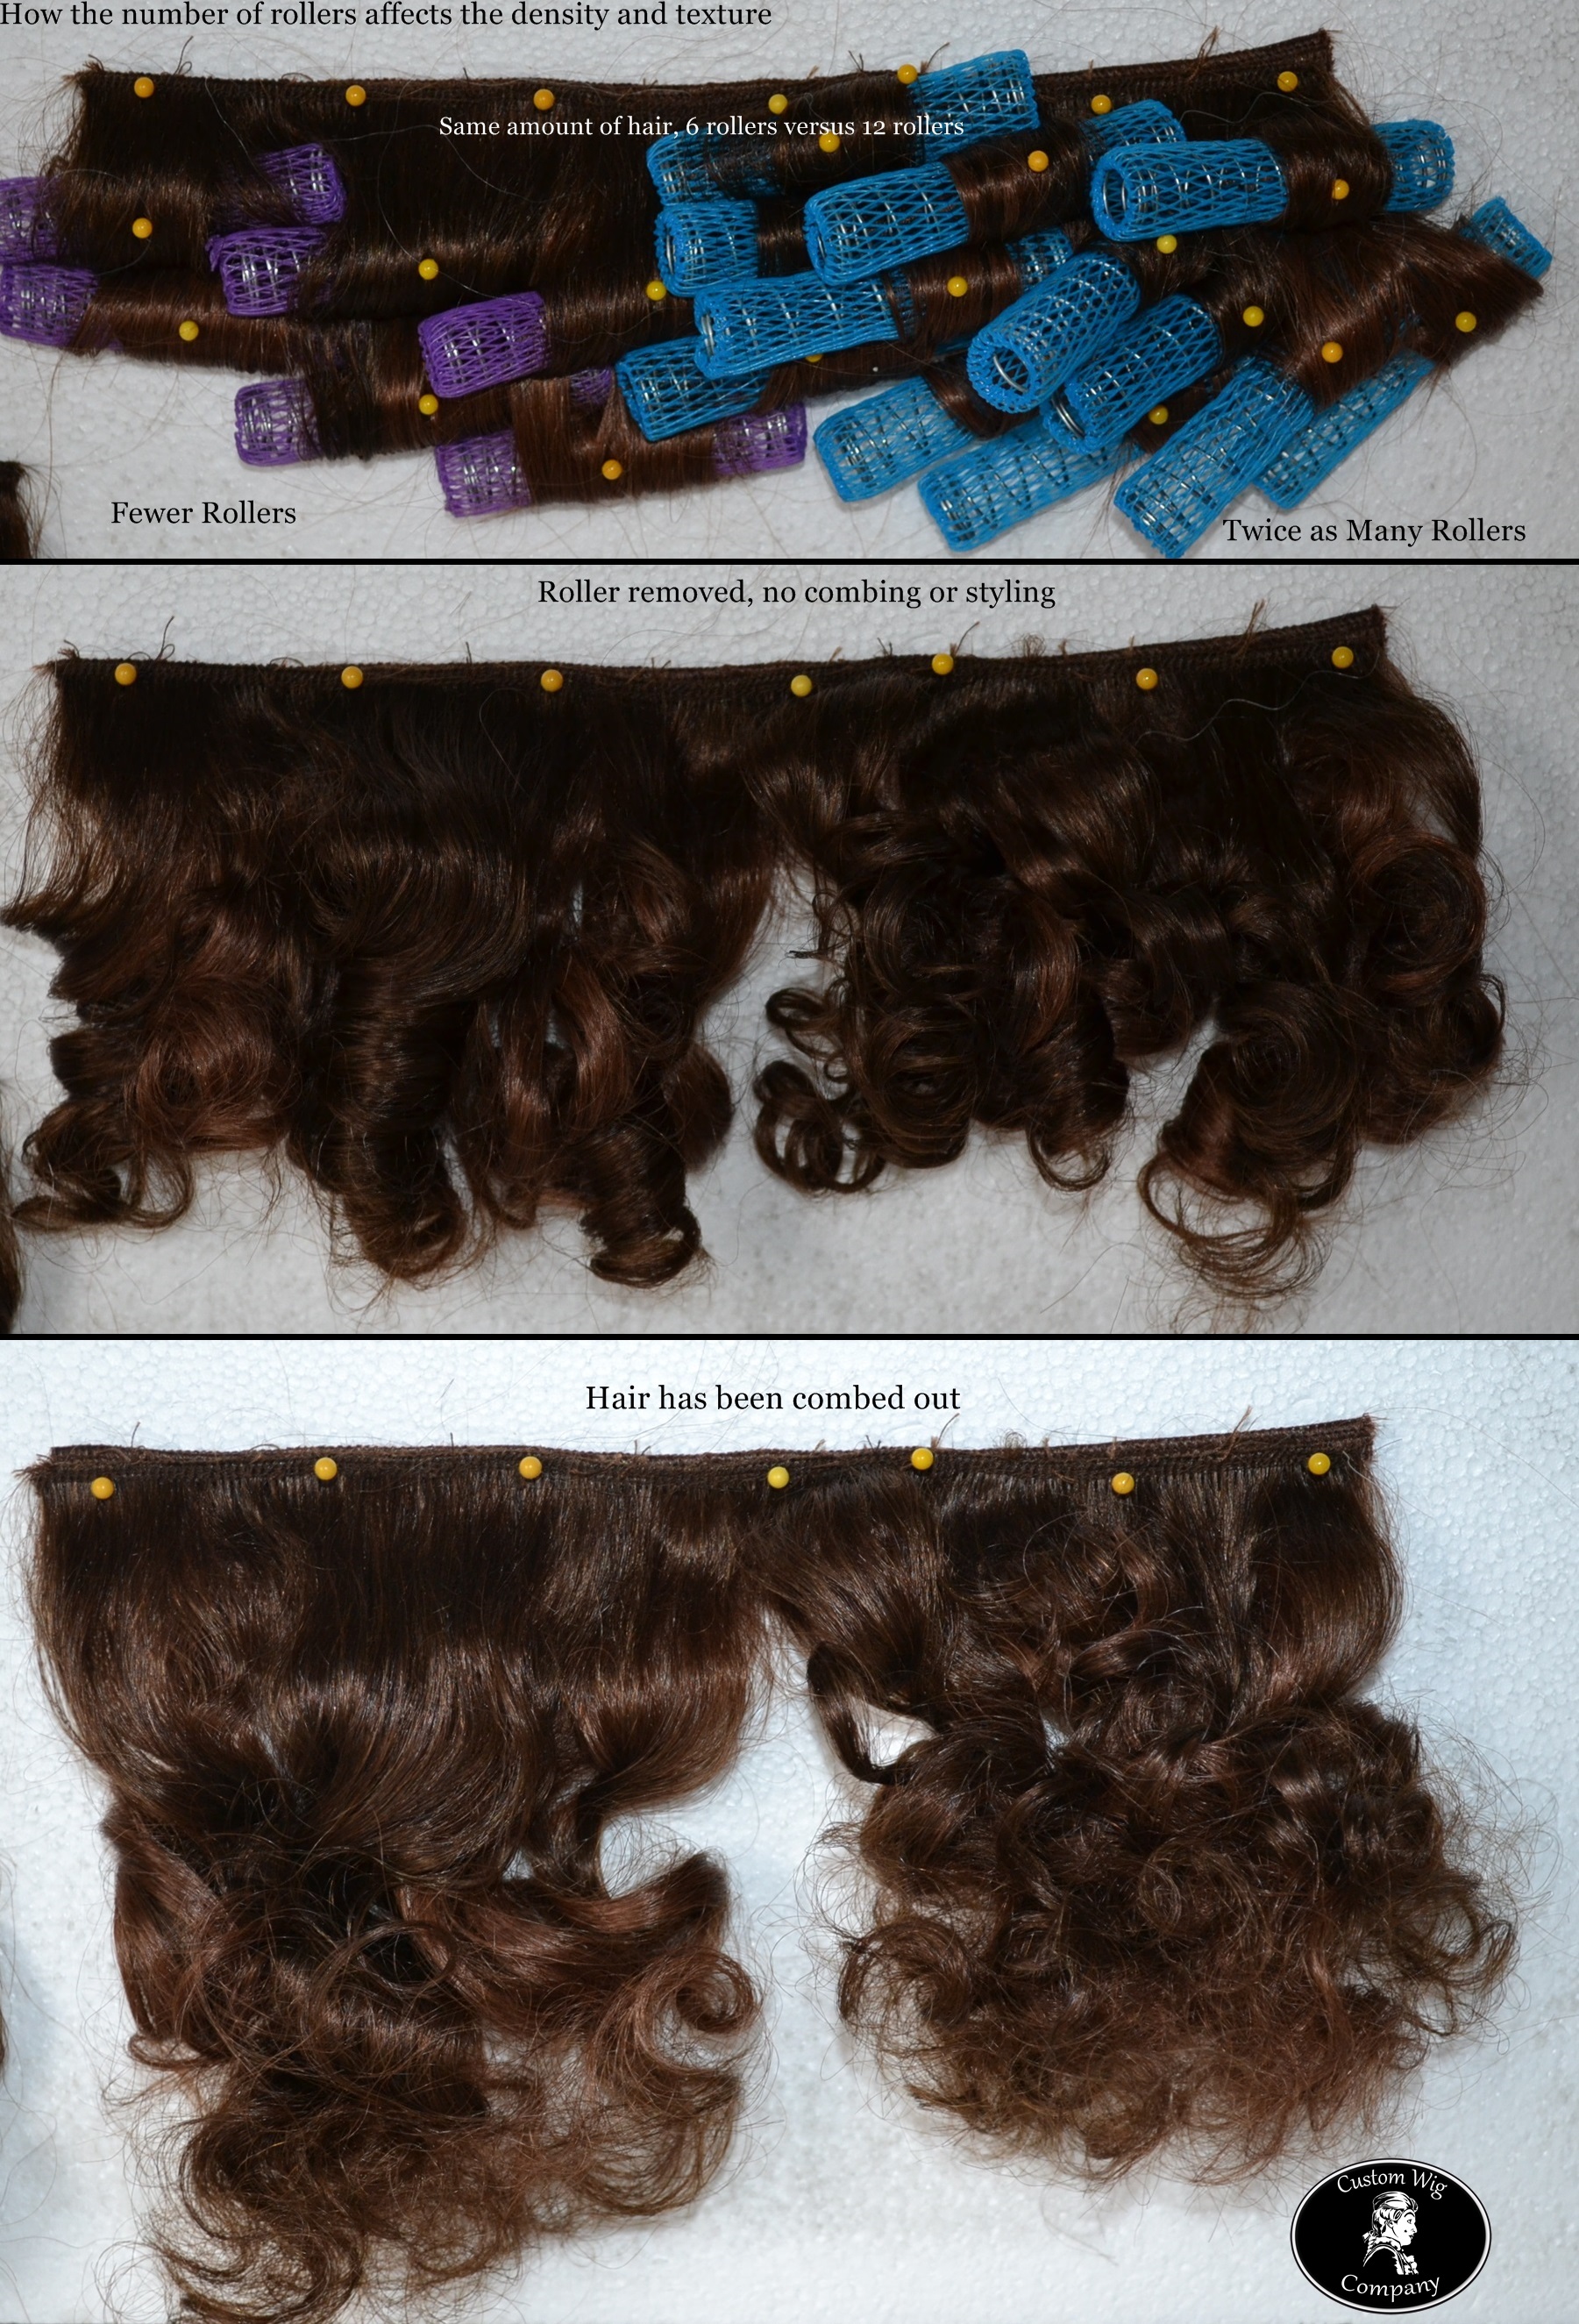
How many rollers you use matters. Once you have some idea what size rollers need to go into the hair style, figure out whether you need a lot of rollers or just a few. Generally, the more rollers you use in a single area of hair, the greater the number of curls produced.
The smaller the roller, the more of them you can fit in the same space. More rollers mean more curls. The opposite is also true. For a large bunch of “poofy” curls, use a larger number of small rollers. For an all-over wave, use just a few large rollers.
In this side by side comparison, we used the same amount of hair but twice as many rollers in the right side. Note, the rollers are the same size, we just used different colors to make it easier to see the two examples.
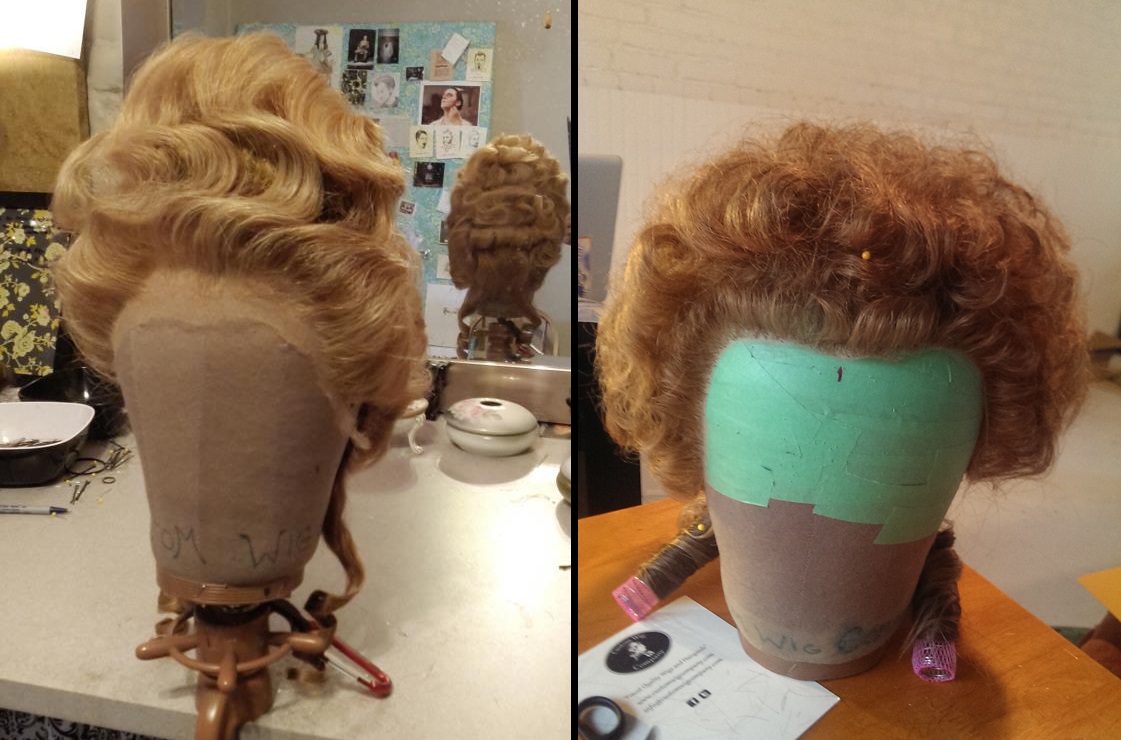
A larger number of curls in the same amount of hair means more volume or “poof”. This is really useful in an 18th century style like the Hedgehog where the desired outcome is a dense, fluffy mound of tightly waved hair. By contrast, a smaller number of larger rollers would yield a smoother, fuller style better suited for a different 18th century style.
The wigs above illustrate the difference between a smaller number of larger rollers, left, and a larger number of smaller rollers, right. The two wigs also illustrate nicely the difference in the shape and size of the waves and curls when different size rollers are used.
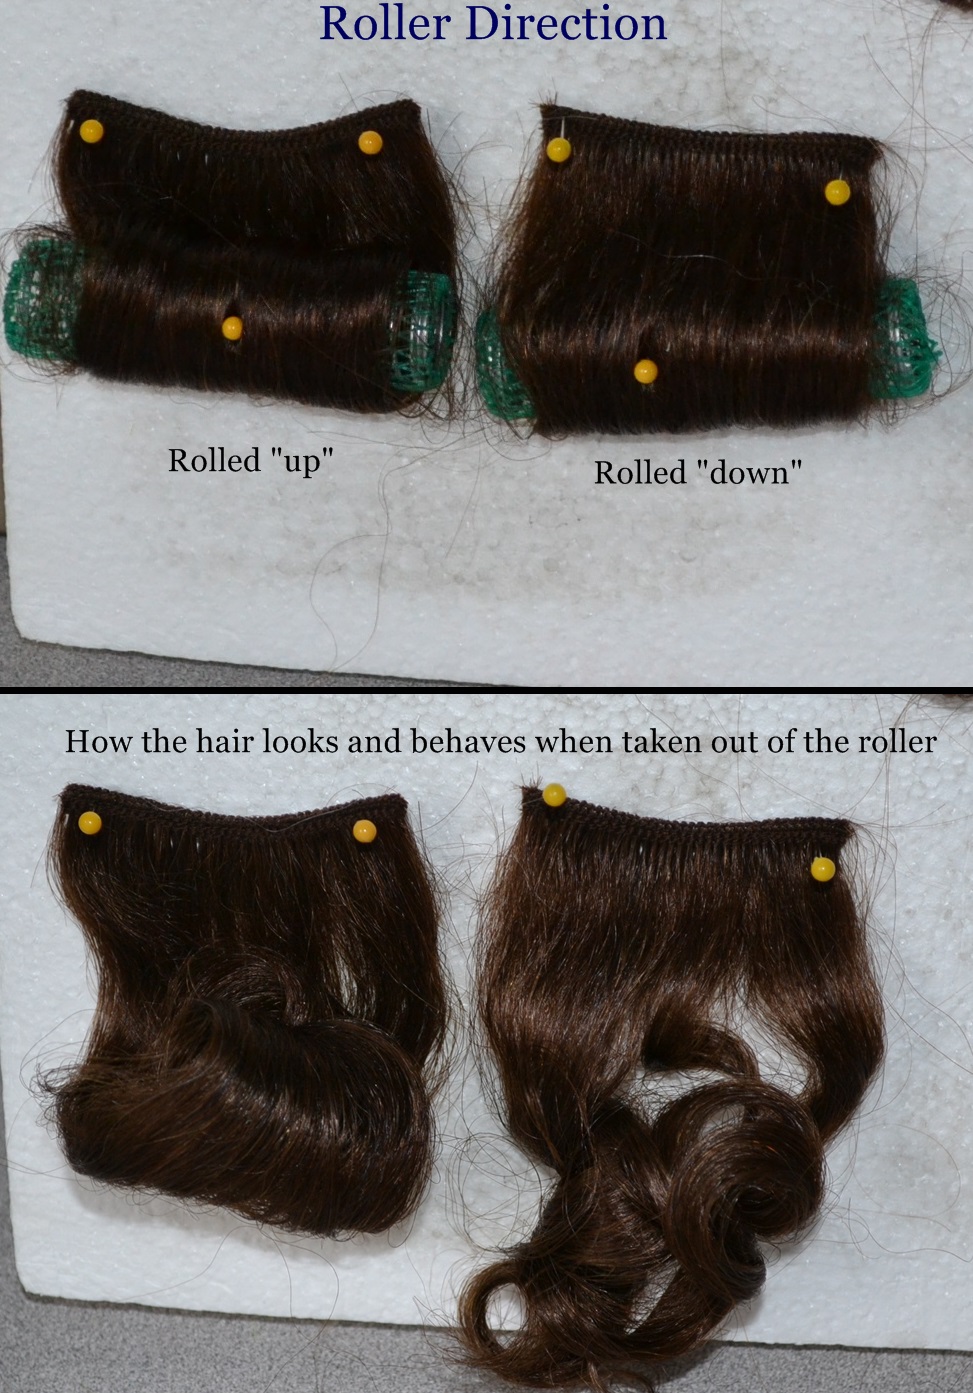
There’s one more really important factor to consider with rollers – the direction the hair is rolled onto them
Essential Wig Styling Supplies
everything you need to style, wear and care for your wigs
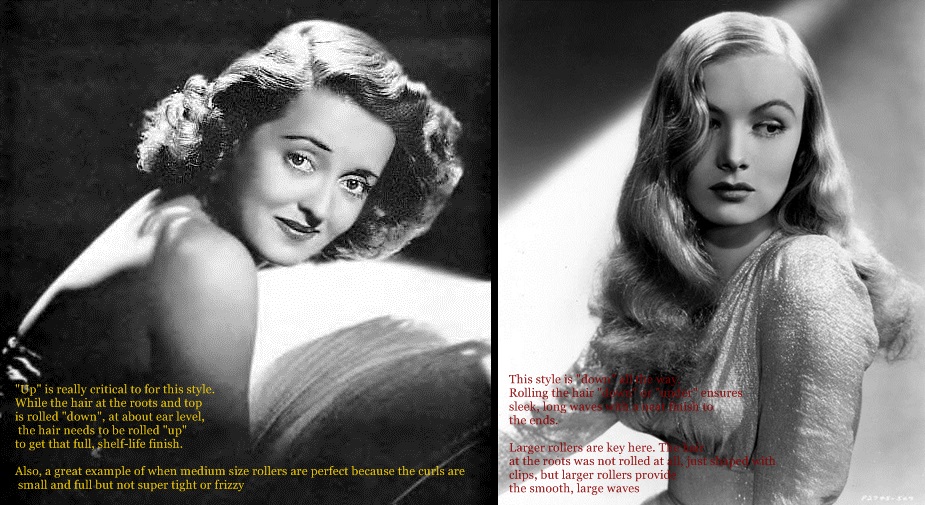
Why does it matter if the hair is rolled up or down? Because the up or down direction will greatly influence how the hair behaves. The majority of hairstyles will utilize the “down” (also called “under”) direction but knowing when to use “up” is important. As you can see in the photo above, the “up” hair is higher than the down. If your hairstyle requires a lot of volume or for the end of the hair to be very full and shelf like, your style needs to finish with at least one row of “up” rollers. Conversely, if your style needs to come to a graceful finish with turned under ends, you need to roll the hair “down”
For many 1930’s styles, especially towards the end of the decade, rolling “up through the lower part of the hair is essential. “Down” is the way to go for most later 1940’s and 50’s styles, or when length is key to the style.
Rollers aren’t just for straight hair.
Rollers help shape and direct curly and wavy hair, too. In fact, textured hair usually holds roller sets better than straight hair.
Roller sets require moisture and heat.
In order for rollers to effectively set human hair, the rolled hair needs to be damp, then dry fully. Using dry heat on human hair will speed up the drying time and make the pattern set much better. Setting gels, applied to damp human hair, also help the style set. But styling products should be a secondary setting method – all the product in the world won’t hold a style that didn’t set completely.
The most reliable way to roller set synthetic hair is steam heat. Use a garment steamer for the best results and thoroughly steam each roller. If you don’t have a steamer, wrap the rolled wig in a wet towel. Use a handheld hair dryer or bonnet dryer (see below) to indirectly steam the wig. Let the wig dry and cool completely before unrolling.
Dry completely before unrolling
If the hair doesn’t dry completely before you unroll it, the set won’t take. For this reason, it’s best to set a wig that’s barely damp rather than a wig that’s dripping wet. Adding hairspray to hair that didn’t set up won’t save the style from falling quickly.
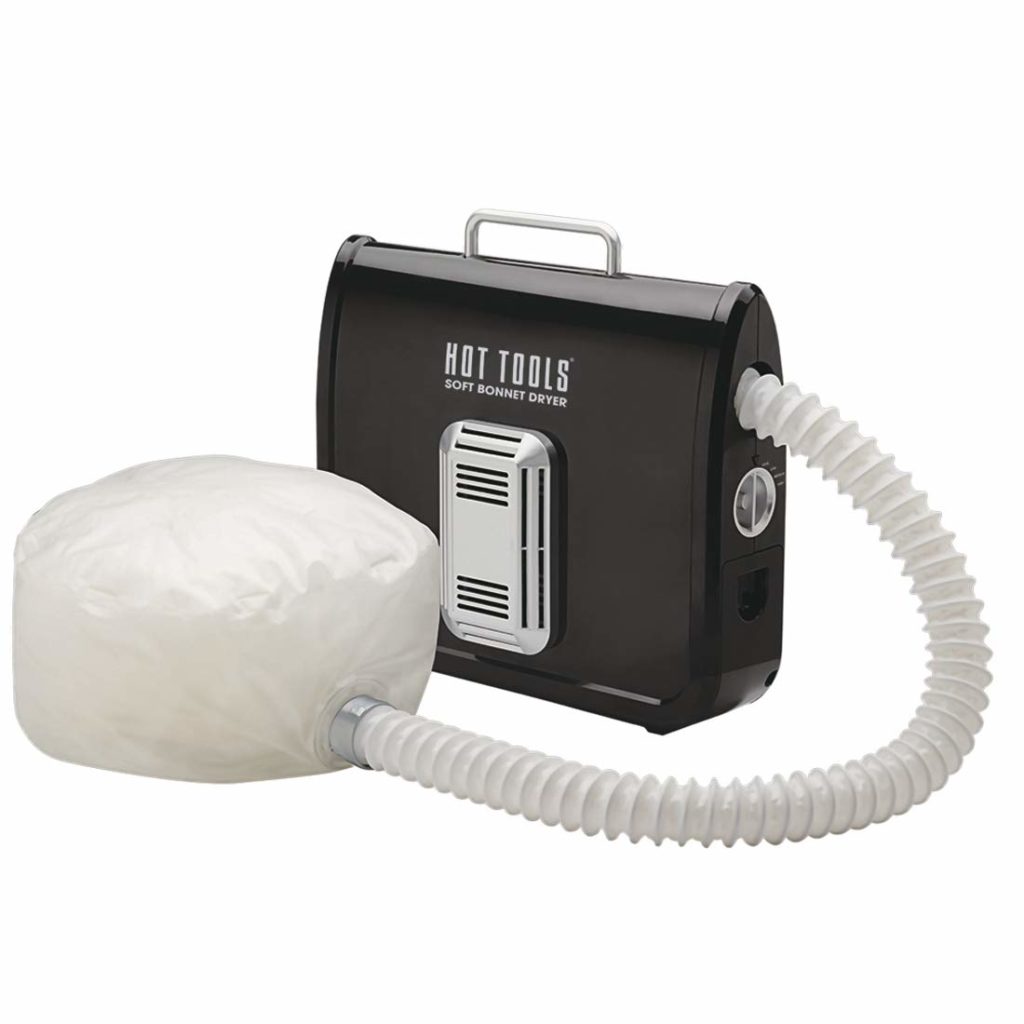
While we use a cabinet dryer in the CWC studio, they a pretty big investment for home wig styling. To add some dry heat to your wig and help really lock the roller set in, try a portable bonnet dryer like this:
Wig Dryer
When using rollers or other styling methods that use water or water-based products, it’s very important to be able to dry the wig completely. The style will also hold better if you can introduce heat into the drying process.
We use a large cabinet wig dryer when roller setting wigs and beards. But those are a pretty big investment for home wig styling, unfortunately. Here’s a good alternative to speed up drying time and introduce gentle heat. This dryer is efficient, lightweight, and will do a great job drying a single wig or beard at a time. We have one for use during events and it works great. The bonnet is a key component since it allows the hot air to surround the wig.
Here’s one last bit of roller technique – how to use rollers to make perfect spiral curls
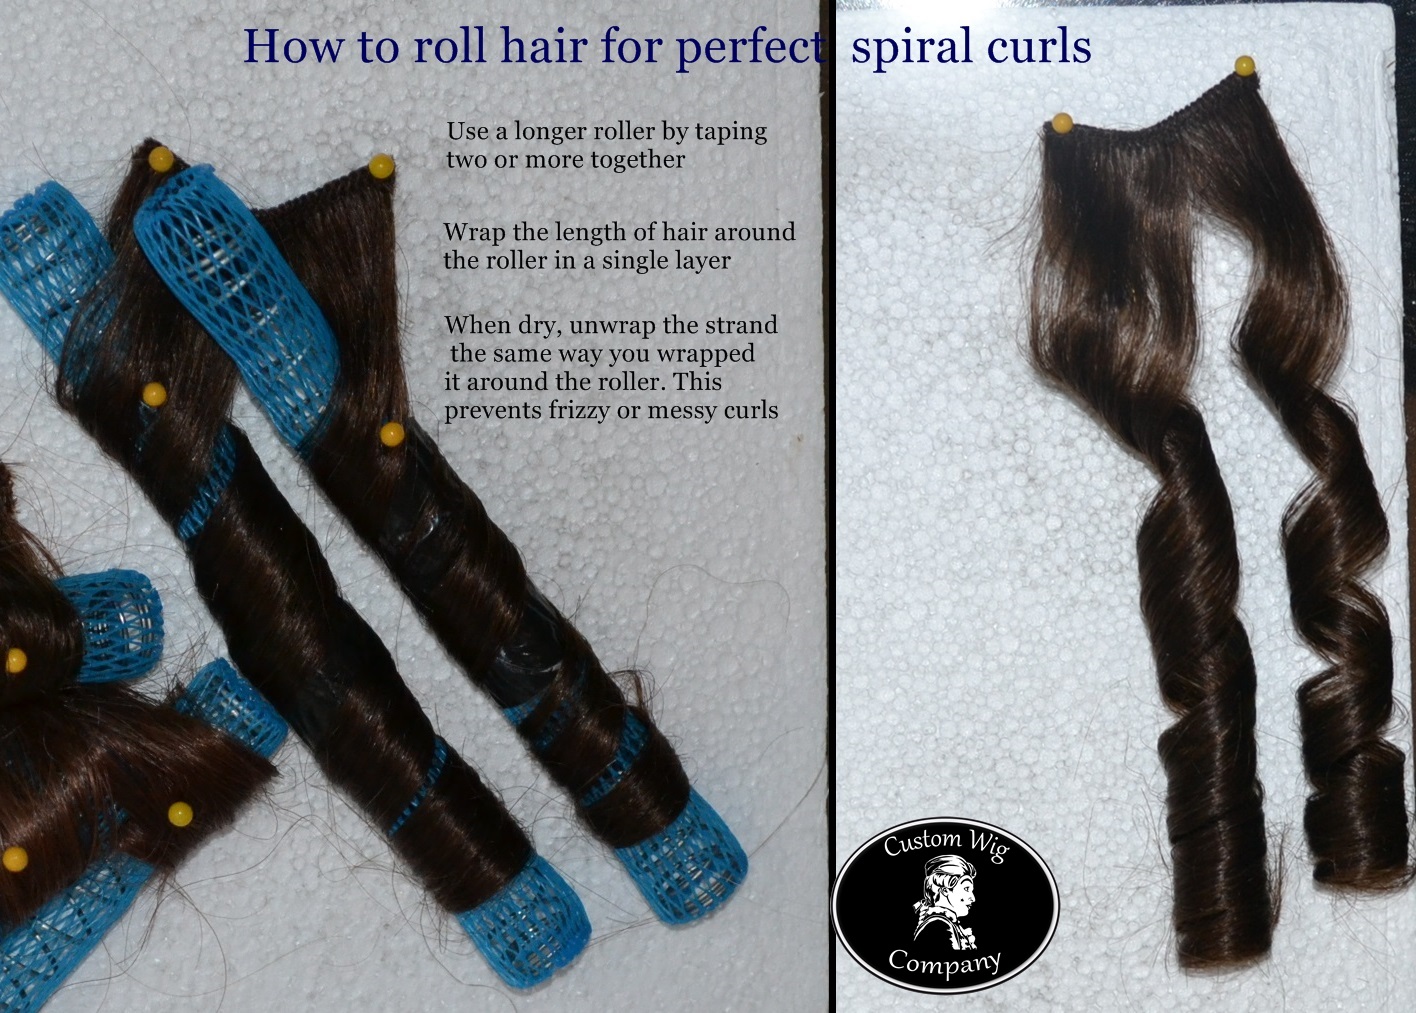
This little tip is key to getting a smooth ringlet that hangs nicely. You want to wrap the strand of hair around the length of the roller – tape rollers together to get a roller that is close to the desired length of your ringlet.
Wrapping the strand of hair around the roller for the full length of the spiral curl yields a smoother, longer and prettier curl. If you wrap the same strand of hair around a single roller, the strand of hair will want to “spring up” and be too short. It won’t want to make a long, graceful lovelock or sleek ringlet. Use a separate roller for each curl you want. The same technique of wrapping the hair around in a spiral will also work with a curling iron.
This visual guide to some of the physics of rollers will help you understand the way rollers shape hair and how to choose the best roller for your style.
In part two, we take these basic building blocks and put them together to achieve styles. We also cover the best ways to roll the hair, products to use, and what to do once it’s time to take the rollers out. Part three focuses on the nuts and bolts of styling the wig you’ve so carefully rolled.
[…] Part One of our Pictorial Guide to Rollers, I showed you how different sizes of rollers affect the size and shape of the hair and what happens […]
[…] In Part 1 of our Pictorial Guide to Rollers, I showed you how the size, direction and density of roller affects hair. Part 2, the Goofus and Gallant edition, showed you some fundamentals of good roller technique – how to correctly wrap the hair, best practices for prepping and handling the hair and rollers and how to anchor the rollers to the hair. Now I’m going to show you how to put that information and technique to use in Part 3. […]
[…] through an indirect heat source (such as a wig dryer or bonneted hair dryer on low). Check out our three part series on using rollers for more information on this. Use steam as the setting agent for synthetic wigs as water based […]
[…] this is your first time here, you might want to review the fundamentals of rollers and technique in Parts 1, 2 and 3 before jumping in […]